My garden is in full swing, and the tomatoes are finally ripening fairly steadily which means it's time to get preserving! My usual MO in the summer is to skin, cook down, and freeze the tomatoes in quart containers, ergo ending up with a freezer full of tomatoes and no space for everything else. I need to get over my fear of killing people with botulism via canning, so I thought I'd start with ketchup. Not just any ketchup, but Chipotle Ketchup.
I first encountered Chipotle Ketchup at Tavern 27 in New Hampshire where the boy and I went on vacation last summer. With advanced notice, they prepared a wonderful vegan tapas platter for me, including chickpea fries with chipotle ketchup. While much recipe related googling yielded several companies that manufacture this fine condiment, I've never seen it in person, and set out to make my own. I couldn't find a ketchup recipe that really suited my needs -- for example, I do not need to make 25 lbs of tomatoes worth of ketchup, and I wanted to use fresh tomatoes not canned, so in the end I cobbled together a few recipes, maintaining appropriate tomato to vinegar ratios, and my first experience in canning was a success. You don't HAVE to process this ketchup for canning, however. You can just put it in the jar and store it in the fridge. I'm trying to avoid using refrigerator space for my projects, so I canned it.
My only criticism in the end is that the ketchup turned out much spicier than I had anticipated. My husband loves it, and its a fast burn, but when I make it again, I will probably cut the chipotles from 4 to 2, or try to get the seeds out of the peppers before adding it to the mix. Ergo, my advice is to adjust your peppers according to how hot you like things.
This recipe calls for 6 lbs of tomatoes. Before you get too anxious, this is what 6 lbs of tomatoes looks like:
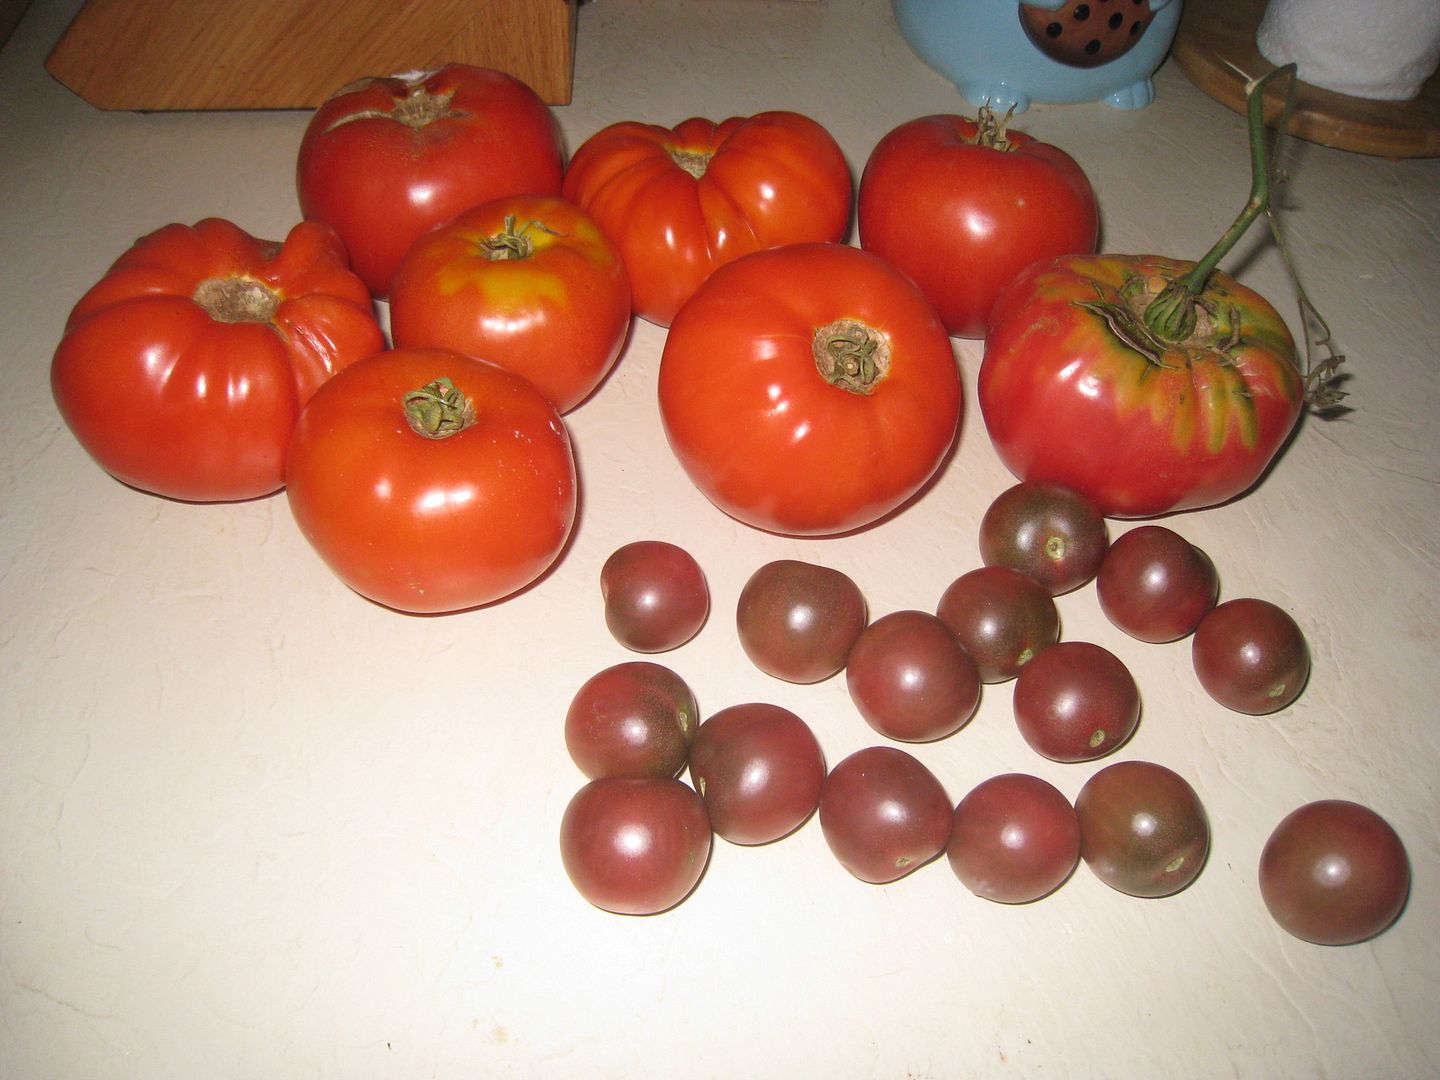
Eight good sized tomatoes, and a few handfuls of cherry tomatoes. Not too bad!
Chipotle Ketchup
Yields approximately 2.5 pints of ketchup

Ingredients:
6 lbs tomatoes, peeled* and rough diced
3/4 tsp celery seed
1 small cinnamon stick
1/4 tsp allspice berries
1/4 tsp mustard seed
1 tsp whole cloves
1/4 tsp pickling spice
1 bay leaf
3/4 cups apple cider vinegar
1/2 sweet onion, rough chopped
1 clove of garlic, crushed
2-4 chipotle chilis, or to taste
1/4 cup brown sugar
3 tbsp molasses
1 tbsp salt
* Before we begin, to peel tomatoes, make an X in the bottom with a serrated knife and carefully lower them into a pot of boiling water for about 30 seconds until the peel starts to split up the side, then transfer them to a bowl of ice water, then the skin will easily slide off!
1. Tie all the spices into a piece of cheesecloth. In a small pot, add the vinegar and bring to a boil. Turn off the heat, add the spices-in-cheesecloth, and allow to steep for 25 minutes, like a very bizarre tea.
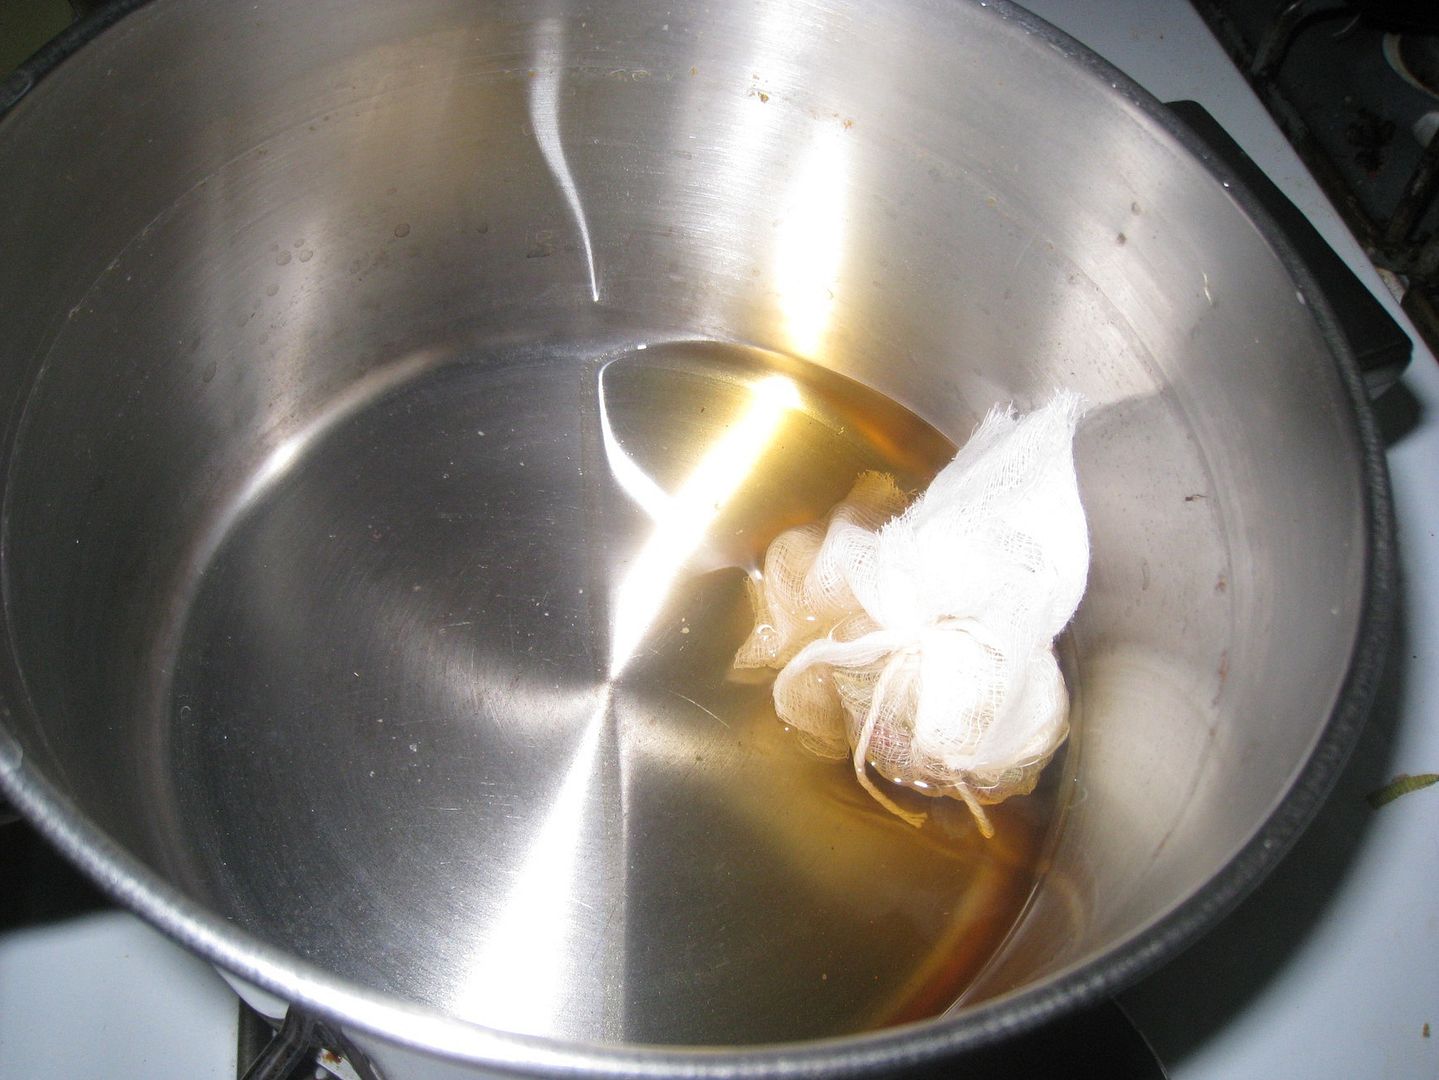
Ok, granted, this picture is sideways and won't rotate no matter what I do to it, but you get the idea about the spices in the cheesecloth in the vinegar.
2. In a large pot, place your tomatoes, onion, chipotles, and garlic, and cook at a low boil for 25 minutes.
3. Add the steeped vinegar (not the cheesecloth), to the tomatoes, and simmer for another 30 minutes.
4. Puree the whole mess. You can do this with an immersion blender, a food processor, or a regular blender - just be very careful when pureeing boiling hot food.
5. Return the tomato mixture to the pot, add the sugar, molasses, and salt. Cook the mixture down at a high simmer until it reaches ketchup thickness - about 2 hours. Puree again if you feel it needs to be smoother.
Now is decision time! You can just put the ketchup in a bottle or jar and stick it in your fridge and you're good to go! If you want to can it, the fun has just begun...
To can!
1. Wash your jars with soap and water or run them through the dishwasher.
2. In your large pot, place the jars and the bands and cover completely with water. Bring the water to a boil. Your goal here is to get your jars to about the same temperature as your ketchup so they don't explode.
3. In a smaller bowl, place the (new! always new) lids in hot water. DO NOT BOIL!
4. Once your jars are nice and hot, place a folded kitchen towel on the counter. Carefully fish a jar out of the boiling water with your jar lifter, and carefully empty out the boiling water. The jar does not need to be dry. Place your funnel in the top of the jar, and fill it to 1/2 inch from the top. Place a lid on the jar, and finger-tighten the band on. Repeat until your jars are full.
* I had ALMOST five half-pint jars full. The fifth I did not process because it was not full, and placed in the fridge for immediate use. Do not process jars that are not full to 1/2 inch from the top.
5. Lower the jars carefully back into your pot of hot water. If there is a lot of room in between your jars, place empty jars (no lids) around them to keep them standing up. Be sure your jars are completely submerged in the water. Bring the water back to a rolling boil, and process the jars for 15 minutes. The water must be kept at a rolling boil the entire time!
6. Turn the heat off from under the pot, and allow the jars to sit for five minutes.
7. Carefully remove the jars using your jar lifter, and place them back on the kitchen towel on the counter. Sit back and listen to 'em pop!
8. Just don't touch them for a while. One, they'll be hot. Two, you want to let them settle or something, I don't remember exactly, but everything I read about how not to kill your family via home preserves says to leave them alone for a bit. I left mine on the counter untouched overnight.
9. 12-24 hrs later check your seal! The buttons on the top should all have "popped" in, and when you remove the bands, you should be able to lift the jars by just the lids and not have them come open. Store your jars in a cool place WITHOUT the bands on. Also, label them with the date and contents. When you go to open them again, check to make sure the tops are all still popped in, that they aren't bulging, that they make the popping sound when you open them, and that they look and smell normal. When in doubt, throw it out!