Showing posts with label dessert. Show all posts

Wednesday, November 24, 2010

Vegan MoFo Day 24: Pecan Bars


Thanksgiving cooking is in full swing! For the past six hours I've been working my butt off in the kitchen prepping as much stuff as I can for tomorrow's feast. Tonight I accomplished the following:
Pomegranate Cranberry Sauce (recipe when I get a good picture!)
Chex Mix
Pumpkin Cheesecake
Apple Pie
Pecan Bars
Green bean casserole
Sweet potato and apple bake (minus the apples -- I'll put those on tomorrow before baking so they don't oxidize)

I'm pooped! But I only have four things (I think? Stuffing, gravy, veggies, heat the seitan... hmm.. I think that's it) that I have to get done before dinner tomorrow, so HOPEFULLY I can spend most of the day relaxing and enjoying the holiday. The stuffing is simple, gravy is pretty simple, seitan in oven is easy peasy, so the scalloped veggies will take the longest.

I tried that recipe from the food network for the pecan bars, and I tweaked it just a hair, and added an extremely valuable instruction to the cooking process. I think if I was going to make them again, I'd use a different crust. Something more like a shortbread like you'd find on the bottom of lemon bars (dammit, now I wish I had also made lemon bars... they sound really good right now!) cause this crust didn't set up as well as I would have liked, however, I think with my instructional tweaking it would resolve at least some of this problem. I also only made half a recipe which yielded 16 bars, which is more than enough considering how rich they are and the fact that we have two pies as well for only 6 people.


The original recipe is here. My changes are as follows:

Ingredients:
Crust --
3/4 cup margarine
3/4 cup all purpose flour
1/3 cup brown sugar
1/2 tsp vanilla extract
Pinch of salt
1 tbsp water

Filling --
1/4 cup margarine, softened
1/2 cup brown sugar
3 tbsp corn syrup
2 tbsp all purpose flour
1 1/2 cups roughly chopped pecans
1 tsp vanilla extract
pinch of salt

1. Preheat the oven to 350 degrees. Grease an 8X8 pan, line with parchment, grease the parchment.

2. In a food processor or with a mixer, blend the dry crust ingredients and the margarine together until it looks like coarse crumbs. Add the vanilla and water and mix just until it begins to form a dough ball.

3. Dump the crust mixture into the prepared pan. With well floured hands, press the crust into the bottom of the pan.

4. Bake the crust for 20-25 minutes or until the edges are golden brown.

5. Meanwhile... cream the margarine and brown sugar. Add the rest of the ingredients and mix until everything is well combined.

6. Now here's the important part that I think was needed that the original recipe didn't mention -- ALLOW THE CRUST TO COOL for 15-20 minutes or until mostly solid before going anywhere NEAR it with the filling. I tried just dumping the filling on and spreading it out and it started to tear the crust and it was a mess. Don't do this.

7. Once the crust has cooled and set, GENTLY spread the filling over the crust, being sure to cover it edge to edge.

8. Bake for 30-35 minutes until golden brown. Allow to cool completely before removing from the pan.

Here's what I like about this recipe:
1. It tastes very much like bites of pecan pie, only without the pesky egg substituting and iffy thickeners.
2. It lends itself to having a small bite, which is good for a pie with the caloric hit that pecan packs.
3. It came together quickly and easily.

Friday, April 9, 2010

Cookbook Review & A Bastardized Recipe

When I was making up my amazon wishlist for Christmas, I came across this book:


Sweet Utopia: Simply Stunning Vegan Desserts by Sharon Valencik. Somehow in all my veg forum reading, I had never come across it. My vegan dessert book collection is pretty hit or miss. Joy of Vegan Baking? Hit. My Sweet Vegan? Miss. (And by miss I mean I got it as a gift probably 2 years ago and haven't made a single thing out of it, though I've read through it on multiple occasions) But it looked interesting, and I thought I'd give it a go. This book does NOT disappoint! There are pictures of every recipe and there isn't a single one in the book that I'm not interested in making! I'd like to work my way through cover to cover, gaining pound upon vegan pound in the process. What sets this apart from the Joy of Vegan Baking (which is a fantastic book as well, but I think everyone knows about it already) is that it is ALL DESSERTS!! Here's what I've made thus far...


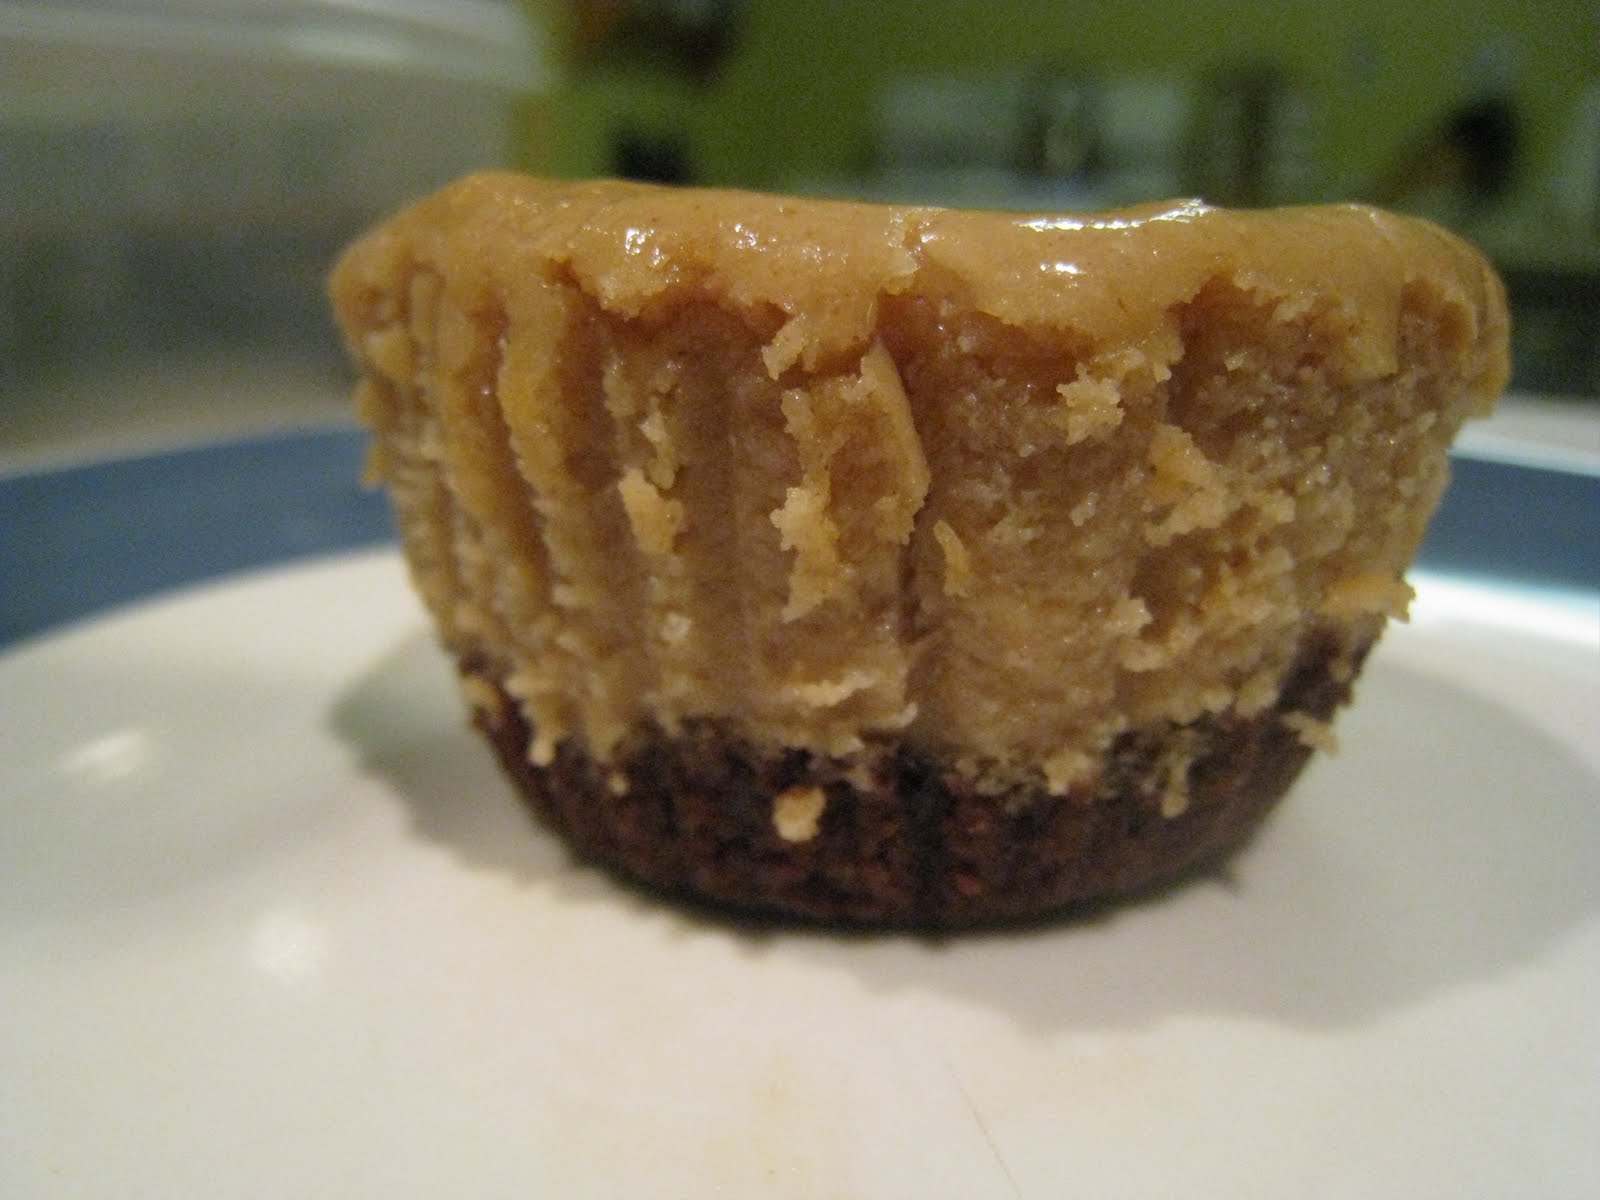
Peanut Butter Mini Cheesecakes
These were the boy's pick for his Birthday, Round 1. It was like eating a gigantic Reese's cup. Totally rich and decadent, it's a good thing they're mini because it would be easy to eat way too much of this and make yourself sick if it wasn't already portion controlled. These were very popular with our dinner party guests, and we didn't suffer at all having to finish the leftover ones!

Ultimate Peanut Butter Cup Cake


I don't actually need to tell you who this was for, do I? Birthday, Round 2. This time with his parents. I only made a half recipe of this cake because there were only 4 of us eating it, and I didn't think we'd need a layer cake. It was fantastic. The frosting was so rich and creamy and the cake itself was incredibly moist with a really good crumb. I think we all ended up having two pieces, even though we were all already stuffed full of Chinese food.

Orange Burst Cookies N Cream

They're the ones on the right. That is the cookie tray I brought to Easter this year. On the left are Raspberry Oat bars from JOVB. I was skeptical about these cookies, but gave them a go and I'm really glad I did. The cookies are orangey but not too sweet, which is compensated by the filling which is super sweet, being cream filling and all. I cut them into egg shapes to make them festive for Easter. The cookies look like they'd be crunchy, but they actually stayed tender, which was great because the filling wasn't super hard, but it didn't squish out the sides. The only complaint (ish?) I had about this recipe was the cream filling recipe made at least twice as much cream filling as I actually needed for the cookies. Turned out Ok though. I made a chocolate cake later in the week and frosted it with the leftover cream. (Haven't uploaded the pic of that yet...)


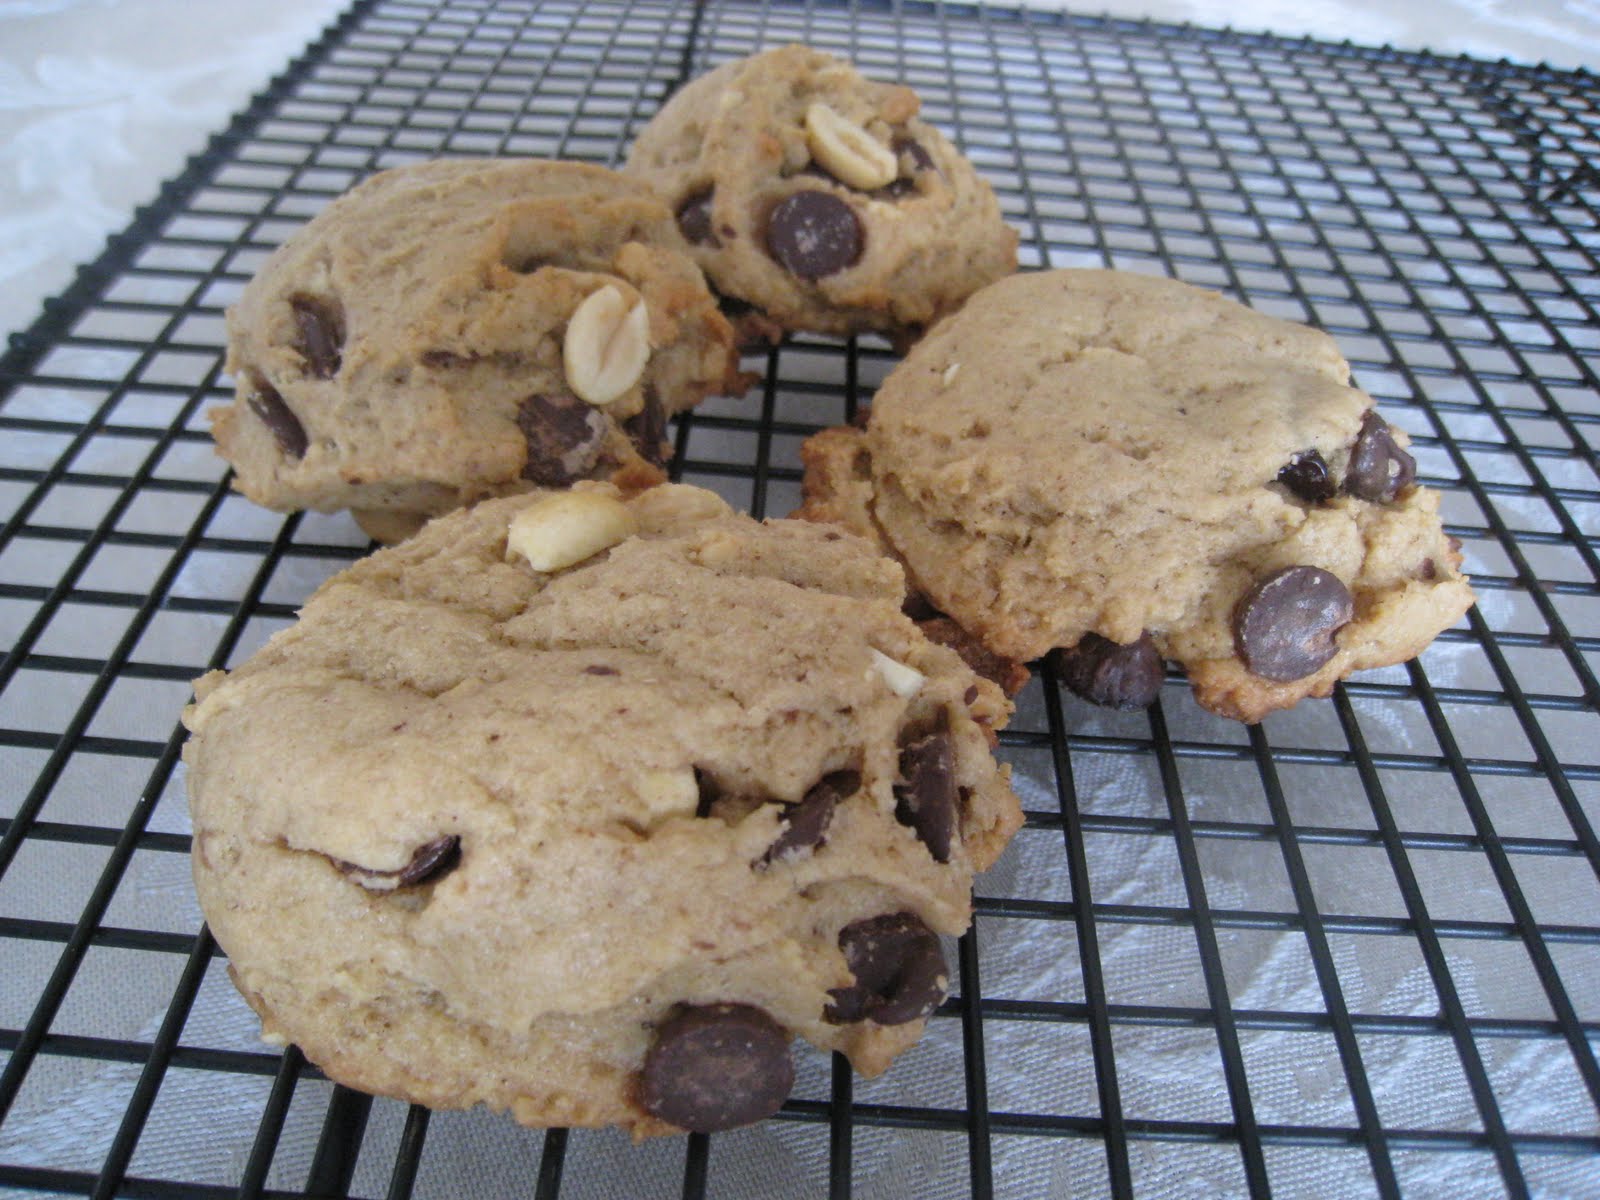
Banana-Cranberry-Cashew Cookies

Ok, that picture is not actually of the banana cranberry cashew cookies. I somehow failed to take a picture of those. That is a picture of my Banana Split Cookies, which is today's featured bastardized recipe, which I altered the original Banana cranberry cookie recipe to become. I was really excited to see another use for black bananas, because I usually have tons of them since as soon as bananas get spotty I don't like them anymore. The original cookie was really good, very cakelike and moist. I decided to play with the ingredients a bit though, and that's where the Banana Split Cookies were born.... they go something like this...

Banana Split Cookies
2 cups all purpose flour
1 tsp baking powder
1/2 tsp cinnamon
1/2 tsp baking soda
1/2 tsp salt
1 cup pureed ripe banana
3/4 cup brown sugar
1/3 cup canola oil
1/3 cup white sugar
1/4 cup peanut butter
1 tbsp almond milk
1 tsp vanilla extract
heaping 1/2 cup shelled peanuts
heaping 1/2 cup dried cherries
heaping 1/2 cup chocolate chips

1. Preheat the oven to 350 degrees.

2. Cream together the oil, peanut butter, and sugars.

3. Add the almond milk, bananas, and vanilla extract and stir until well combined. (Doing all this with an electric mixer really speeds things along)

4. Sift in the dry ingredients and stir until just combined. Fold in the chips, nuts, and cherries.

5. Drop 1 tbsp of dough per cookie onto a greased baking sheet and bake for 13-15 minutes or until the edges begin to brown. These cookies do not spread, so if you don't want them in ball form (which is a legitimately delicious option), flatten them out a bit with your palm before baking.

Sunday, November 1, 2009

Individual Baked Apple Crisps

Another chapter in the 1001 things you can do with apples! But first...

Next weekend is the SECOND ANNUAL PRE-THANKSGIVING VEGAN THANKSGIVING POTLUCK here in the Albany, NY area. More specifically, in my house. If you are in or around or willing to travel to the NY State Capital Region, and are free on Saturday, November 7th from 2pm until we can't move anymore, and want to share some awesome vegan food, let me know and I'll send you further details!

Onto the apples!

I was a whiny mess last week when I was sick, so I wanted to make a nice treat for the boy because he put up with me. With just the two of us, making an entire apple crisp or an entire apple pie is just a bit much, and while I love baked apples, the boy typically would prefer a dessert with a bit more pizazz. These turned great. They were super simple to make, and really delicious! I didn't have a recipe, I just winged it based on the size of the apples and the proportion of stuff I wanted to put inside of them. Dried fruit or chopped nuts would also make great additions to the filling if you've got them around.


Individual Baked Apple Crisps

2 large apples
1 tbsp vegan margarine, melted
2 tbsp dark brown sugar
1/2 tsp ground cinnamon
Heaping 1/4 cup rolled oats

1. Peel a band of skin off of the outside of each apple. Cut a hole into the top of the apple as though you were cutting a pumpkin for carving. Scoop out the seeds and core, leaving just a little bit of apple at the bottom to help hold the filling in. Snack on the extra apple bits that came out.

2. In a small bowl, mix the brown sugar and cinnamon into the melted butter to dissolve the sugar, then add the oats and stir to coat in the sugar/margarine mixture.

3. Fill the empty apples with the filling and bake at 350 degrees for about 45 min to 1 hr or until the apples are tender when poked with a fork. (This will depend on the size of your apple!) Serve warm for optimal deliciousness.

Tuesday, October 27, 2009

Recipe Mix & Match

I have been delinquent. I haven't actually cooked at all since the last day I posted because I've been sick. I'm still not feeling 100% but I'm certainly doing better than I was last week. I was going to post my method for crispy tofu, but it seems those pics are still on my camera, and the battery is charging right now, so I thought instead I'd show you my creative recipe combining to make a new recipe.

My wonderful friends came and watched my cats for us while we went downstate for Nana's bday last weekend, and so I paid them like you pay any good friend pet-sitters -- in baked goods. The request this time was for chocolate brownies with chocolate chips and peanut butter frosting. I looked through my different cookbooks to find recipes that would fulfill this need and ended up choosing the Chocolate Brownie recipe from The Joy of Vegan Baking and to top it, I made the Peanut Butter Caramel from the apple bars in Veganomicon. The results??


Delicious! I didn't realized until I'd mixed up the ingredients for the brownie batter that it was, essentially, a fat free brownie recipe. Not that that makes it healthy... but I was worried that they wouldn't be rich enough. I was wrong, they were definitely rich enough!! The recipes says that they'll be fudgy if cooked for the instructed time, but I had to bake them for an extra 10 minutes because the middle of the pan was absolute liquid when the timer went off. They weren't totally fudgy, they definitely had a cakey feel to them, but they were definitely a brownie and not a cake! The peanut butter caramel frosting paired very well with them. It made them nice and gooey and sticky and delicious.


The moral of this story is don't be afraid to just take parts of recipes that you like and put them together to make new recipes! The results could just be delicious!

Saturday, October 10, 2009

Mini Pumpkin Pies with Brown Sugar-Walnut Topping

Two Christmases ago I ordered some kitchen related gifts from amazon.com for my sister, and they had a deal where if you ordered kitchen stuff you got a free subscription to either Gourmet Magazine or Bon Appetit Magazine. I ordered free Gourmet Magazine and it was a megatarian hell. They did have ONE vegetarian dish per issue but it was always very cheese or egg laden. A few other things were coincidentally vegetarian, but nothing really interesting. This past Christmas, same deal, only this time I chose Bon Appetit. Honestly, it's not much better. I've given away most of my issues from this year thus far, though I did photocopy a section about bar cookies that I thought I might veganize. This months issue was the Thanksgiving issue and surprisingly, it has several accidentally vegan or easily veganized side dishes and desserts! One in particular that caught my eye was Pumpkin Pie with Brown Sugar-Walnut Topping. Since the boy is off playing D&D all weekend, I had some friends over and we turned this recipe into Mini Pies using Keebler graham cracker mini crusts, which are accidentally vegan, but do contain trans fats (boo). I had them leftover from something and sitting around my pantry forever so I thought I'd use them up. We veganized the recipe, and only made a half batch of filling and topping, and it made six perfect mini pies. The filling was nice and creamy and well spiced and the sweet nut topping complimented it well. While the original recipe called for just a normal pie crust, the graham crust worked out just fine. If you wanted to make this into a whole pie, just double the recipe!

Mini Pumpkin Pies with Brown Sugar-Walnut Topping
Crust:
One 6 pack of mini graham cracker pie crusts
Topping:
1/4 cup walnuts
2 tbsp brown sugar
1/4 tsp ground cinnamon
Filling:
1/2 cup brown sugar
1/4 cup plain or vanilla soy yogurt
1/4 tsp salt
1/4 tsp ground cinnamon
1/4 tsp ground ginger
1/8 tsp ground cloves
1/2 cup canned pumpkin (not pumpkin pie filling!)
1/2 cup soy creamer
2 tbsp cornstarch

1. Preheat the oven to 350 degrees.

2. In a blender or food processor, process the nuts, brown sugar and cinnamon together until the nuts are ground into fine crumbs.

3. In a large bowl, whisk together all the filling ingredients until smooth.

4. Divide the filling evenly between the 6 cups (place them on a baking sheet to make transfers in and out of the oven easier!) and bake for 30 minutes.

5. Lower the oven temperature to 325, remove the pies and sprinkle with the topping them put them back into the oven to bake for about another 15 minutes, until the middle is puffy and they're set.

6. Allow the pies to rest at room temperature at least an hour before serving. (If you're making a big pie, it might need to rest/chill longer to be able to slice in neat slices... all the more reason to make mini pies!)

Saturday, July 18, 2009

Banana Fudgesicles & Garden Bounty

I don't like bananas once they've got brown on them. I can take a wee bit, but as soon as they start to get spotty I declare them overripe and have to find other things to do with them. I'm not much of a smoothie drinkers, so though I freeze them sometimes I forget about them. I make banana bread and banana muffins but it seems like more of a winter thing to me. In order to remedy my banana problem I did the only logical thing... I invented BANANA FUDGESICLES!! This frozen treat is remarkably healthy for a fudgesicle. It is mostly sweetened by the ripe bananas, and a little bit of agave. They only take a few minutes to put together, then however long it takes for them to freeze. My one warning about this recipe, however, is that the measures will vary for you depending on how big your bananas are, and how big your ice pop molds are. For me, this makes 4 ice pops, sometimes a little more full and sometimes a little less (again, banana size). So use this as a guideline and then adjust as necessary.


I know, lame picture right? I heard the boy going into the freezer for the last one last night and I said "WAAAIT I NEED A PICTURE FOR MY BLOG!!" so he came into my office and let me take a picture before he ate... much.

Banana Fudgesicles
2 very ripe bananas
1/3-1/2 cup rice milk
2 heaping tbsp cocoa powder
1-2 tbsp agave nectar (depending on how brown your bananas are! more ripe = less agave)
1/4 tsp vanilla extract

Puree all the ingredients together. I use my immersion blender and the cup it came with. It's the perfect size and has a pour spout. Pour the mixture into ice pop molds. Freeze for at least 4 hours or until solid. Run the mold under warm water to release to fudgesicle.

Varation: Add 2-3 tbsp of peanut butter to the mix to make PEANUT BUTTER BANANA FUDGESICLES!


Onto my second topic: Check out what I picked in my garden this morning! A couple handfuls of sugar snap peas and some interesting purple striped beans. If anyone can identify them, I'd be most grateful!

Monday, March 31, 2008

Peach-Mango Crisp with Ginger-Pecan Topping

I somehow ended up in charge of Sunday dinner again while I was home visiting my parents. Because I had planned a relatively complex dinner, I didn't want to go too crazy with the dessert. My dad is always a big fan of fruit pies but this is sort of an odd time of year for fruit. The apples and pears are dying out and it's not quite time for berries and stone fruits. Also, while easy as pie, they involve making crust and I didn't want to go through the trouble so I decided on a crisp. While I was at the market, I thought peaches and mangoes sounded good, and what goes better with peaches and mangoes than ginger and pecans! Sold. The mangoes and peaches were both slightly underripe because as I said, weird time of year for fruit, so I made a spiced peach nectar syrup to go on them and it worked brilliantly! This recipe actually filled a 10X10 baking dish, and so it would probably fill a 9X13 baking dish equally well, which is, in fact, an awful lot of fruit crisp. Wouldn't hurt to scale it down if you're not cooking Sunday dinner.


Peach-Mango Crisp with Ginger-Pecan Topping

5 peaches, peeled and sliced into 1/4 inch slices *
2 mangoes, peeled and sliced into 1/4 inch slices
12 oz can of peach nectar
1" piece of ginger, peeled and cut into coins **
2 1" strips of lemon zest
1/4 tsp ground cinnamon
1 tbsp cornstarch dissolved in about 1 tbsp cold water
1 tsp vanilla extract

For the crisp topping:
1/2 cup margarine, softened
2/3 cup all purpose flour
2/3 cup rolled oats
2/3 cup brown sugar, packed
1/2 cup chopped pecans
2 tsp ground ginger
1/2 tsp ground cinnamon
Pinch each of nutmeg and ground cloves

Preheat the oven to 375 degrees

1. Mix your fruits together in a large bowl.

2. In a small saucepan, bring the peach nectar with the fresh ginger, 1/4 tsp cinnamon, and lemon zest to a boil. Reduce the heat to low and simmer for 20 minutes to infuse the flavors.

3. Remove the ginger and lemon zest from the nectar. Return it to a boil, then whisk in the cornstarch. Simmer for a minute to thicken, remove from heat, stir in the vanilla, then pour over the peaches and mangoes.

4. Pour the peaches and mangoes into a baking dish.

To prepare the topping...
Cut the margarine and flour together until crumbly. Add everything else and mix together with your fingers until well combined. Pour it all over the middle of the fruit, then spread to the sides to cover completely and pat down lightly.

Bake for 40-50 minutes, or until the fruit is tender and bubbley.

I can't decide which picture I like better so I'm posting them both

Tuesday, March 11, 2008

PMS Crunch Bars

Sweet, Salty, Peanut Buttery, Chocolate, Crunchy, and Chewy... so many wonderful flavors and textures all rolled into one with these bars. I've dubbed them "PMS Crunch Bars" because they so very well satisfy those special girl cravings. Boys dig these bars too, albeit on an entirely different level.

I don't have any one particular source for this recipe. The base is like the Special K Bars my mother made when I was a kid, only with Rice Krispies instead of Special K*. One time I made them and thought "Hmm these would be awesome with pretzels to offset the sweet" and then "Mmm Chocolate Covered Peanut Butter Pretzels.." and the rest is history.

PMS Crunch Bars
1 cup white sugar
1 cup light corn syrup
1 cup crunchy peanut butter
4 cups puffed rice cereal **
2 cups thin pretzels, broken up by hand into small pieces
1-2 cups chocolate chips, depending on how chocolately you want them
Sprinkles or chopped peanuts, if desired

1. In a large saucepan over medium heat, stir together the sugar and corn syrup until the sugar is dissolved and the mixture is just boiling.

1. Add the peanut butter and stir well until it's melted together into one molten peanut sugar mixture.

3. Add the cereal and pretzels and mix well until all the cereal and pretzels are all coated in the goo

4. Spread the cereal mixture evenly into a lightly greased (cooking spray works great here) 9X13" pan.

5. Melt the chocolate chips in the microwave or over a double boiler until smooth. Spread on the top of the cereal bars. Sprinkle with sprinkles or chopped peanuts, if desired.

6. Cut the bars into squares once they have cooled completely.

7. Enjoy sugar buzz.

A shot of the unfrosted bars. Mmm check out that peanut butter pretzel cerealy goodness.

* According to my mother, Special K used to resemble Rice Krispies before it was a flake cereal. The recipe is from the pre-flake Special K days. When they switched to flakes, my mom switched the Rice Krispies for the bars.

** I actually like the really cheap "PUFFED RICE" that comes in a bag for these bars. Regular Rice Krispies will give you a more "marshmallow treat" type texture. Try it both ways, or go half and half if you're feeling adventurous!