I was thumbing through my cookbooks this weekend trying to come up with meal ideas for the week. I came across a recipe for Roasted Corn Chowder in Vegan Planet by Robin Robertson that I thought sounded good with all the nice fresh local corn we've been getting lately. I've had Vegan Planet for a while now, and I don't recall ever making anything from it. I'm surprised by that too because I have a few other of Robertson's cookbooks that I use all the time. I think when it came down to it I realized that the typeface in Vegan Planet bugged me and I don't find it very readable. I'm glad I suffered through it though because the chowder was delicious! I felt a little silly cooking soup on a late July night, but when else are you going to have beautiful fresh corn? I topped the soup with homemade croûtons and some basil chiffonade (as the recipe recommended) and it was just perfect. Not too heavy for a summer night with the sweet corn flavor dominating. The only major change I made was that I used a shallot instead of a small onion because I had a shallot and they don't bother my belly as much as onions do!
Roasted Corn Chowder
4 ears of corn
1 tbsp olive oil
1 shallot, diced
1 celery rib, diced
3 small yukon gold potatoes, diced
4 cups (1 quart) vegetable broth
1 cup plain rice milk
Salt and Pepper to taste
Basil chiffonade for garnish (just those little basil strips as seen in the picture)
1. Peel back the corn husks and remove the silks, then close up the corn again. Place the cleaned ears corn on a baking sheet and bake in a 450 degree oven for 25-30 minutes. Once they're done and cooled, cut the corn off the cob with a sharp knife. The "bowl in bowl" technique is good for this to keep the corn stable and to keep the kernels from going all over the place. Basically, you take a small bowl with a rim and put it upside down in a larger bowl. Use the small bowl to stabilize the corn and carefully cut the kernels off the cob. I thought an illustration might help:
2. Heat the oil in a large pot over medium heat and add the shallot and celery rib. Keep the heat medium low, cover and cook for about 5 minutes until tender.
3. Add the potatoes and vegetable broth and cook for 25 minutes until the potatoes are tender.
4. Add the corn to the soup and simmer, uncovered, for another 15 minutes.
5. Put 2 cups of soup in the blender and blend until smooth. ** Hot soup in a blender will build up steam quickly and the top will explode off ** To avoid this, open the part of the blender lid that opens or comes off so you can pour in ingredients and replace it with a folded dish towel. This will allow steam to escape and not soup. **
6. Pour the blended soup back into the rest of the soup along with 1 cup of rice milk. Stir. Taste and adjust seasonings as needed.
7. Serve with croûtons and top with fresh basil as desired.
Basic Guidelines for Croûtons
1. Cube however much bread you want for croûtons. I did 2 slices of multigrain, one slice of whole wheat, and a homemade pumpernickel roll. Crusty stale bread is best.
2. Spray down a baking sheet with olive oil. Put the bread cubes on the baking sheet, then spray them with olive oil. Sprinkle with salt and pepper and any other seasoning you like (tonight was basil), toss, and then spray again with olive oil.
3. Bake in a 400 degree oven until sufficiently toasty and crunchy -- about 15-20 minutes, stirring every 5 minutes.
Finally...
How to Keep Your Cat from Getting Underfoot While You Cook
I can't explain it. My cat Atticus loves to lick corn cobs. He doesn't eat any kernels he pulls off, but he likes to bite and lick at the cob. PLEASE do not leave your cat unattended with a corn cob because my cat is a goofball. And DOUBLE PLEASE don't ever give your dog corn on the cob because it can cause an obstruction and make your dog very very sick. Public service announcement over. You can now continue enjoying the picture of Atticus enjoying a corn cob.
~ m e g a n ~ v e g a n ~ v e g e t a r i a n ~
~ d e l i c i o u s ~ a d v e n t u r e s ~ i n ~ v e g * n ~ c u i s i n e ~
Tuesday, July 29, 2008
Pasta with Snap Peas, Canadian Facon, and Sundried Tomatoes
Garden excess is the mother of recipe invention. Last summer was my first bumper crop of sugar snap peas in my very own garden. I was picking between 1 and 2 pounds of peas a week for at least 8 weeks, and while they are absolutely divine to munch on raw, I needed to find other uses for them. I made this recipe up last summer and now that we're back in sugar snap pea season, it's made its way back onto our plates. It features a rare fake meat (that I didn't make myself) component! The combination of sweet snap peas, salty smoky Canadian Facon, and tangy tart sundried tomatoes is perfect. The entire meal takes about as long as it takes to cook the pasta too. Just another reason it's great in the summer!
Pasta with Snap Peas, Canadian Facon, and Sundried Tomatoes
1/2 lbs pasta (I used the remainder of two boxes in that picture, hence the blend)
12 oz or about 4 cups of sugar snap peas, strings removed
1 package Yves veggie Canadian Bacon, diced
10 sundried tomatoes, rehydrated and chopped
1 tbsp olive oil
2 cloves garlic, diced
Handful of fresh basil chiffonade (rolled up and cut into strips)
1. Bring a large pot of salted water to a boil and prepare pasta according to package directions.
2. In a large skillet, heat the olive oil over medium-high heat and add the diced Facon. Fry the facon until it begins to brown.
3. Add the snap peas and garlic and cook for about 3 minutes or until the snap peas are bright and just tender. DO NOT OVERCOOK! You still want them crisp, just not crunchy.
4. Toss in the sundried tomatoes and basil and toss with pasta. You can add a little of the sundried tomato soaking liquid if it seems too dry.
Monday, July 21, 2008
Vegan Potluck!!
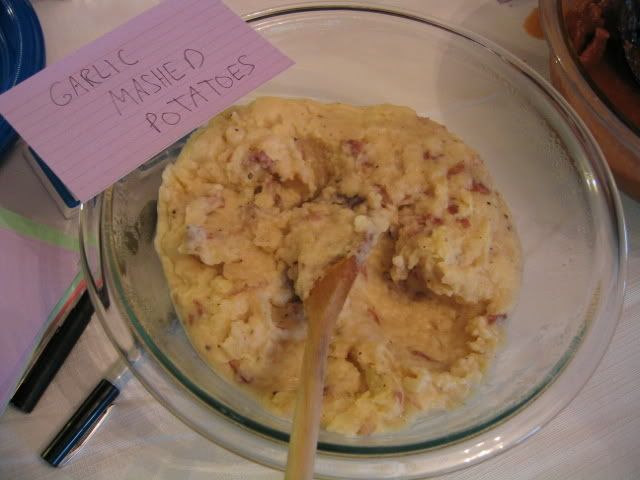
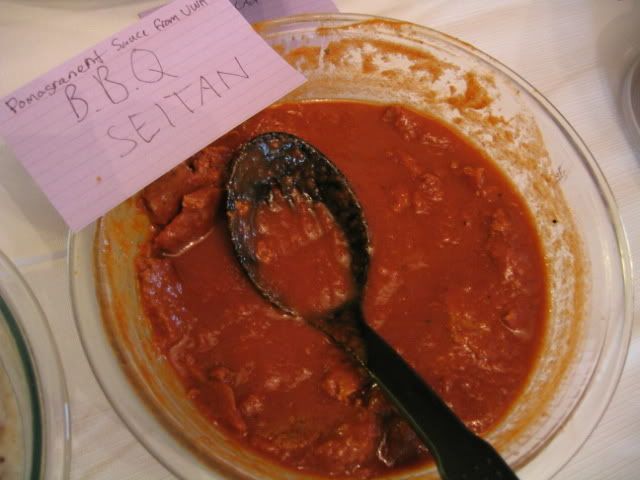
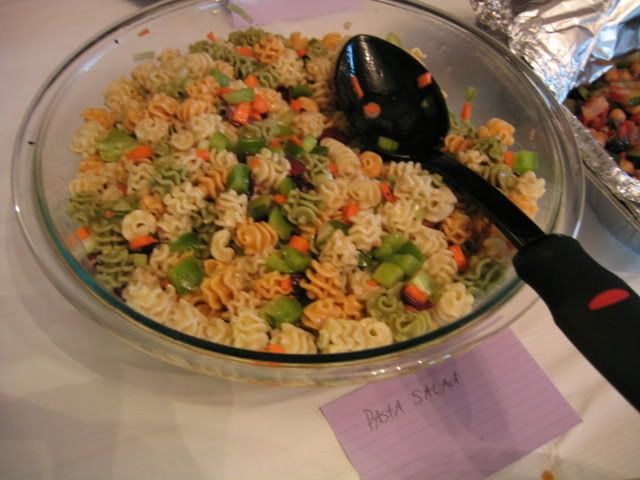
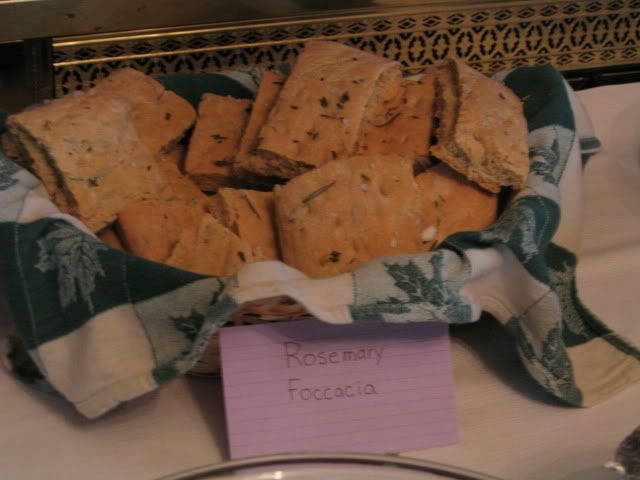
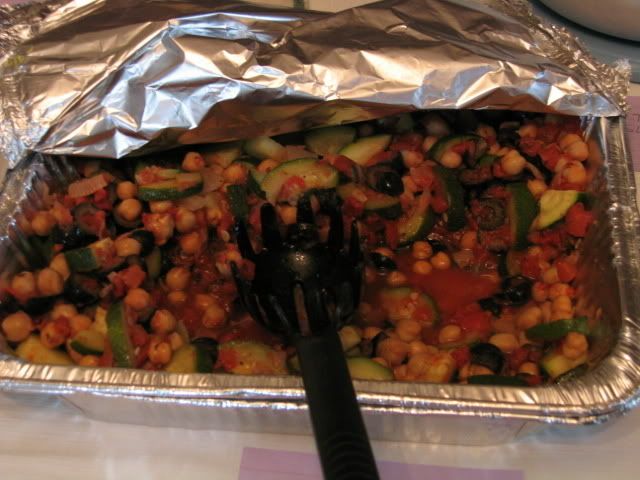
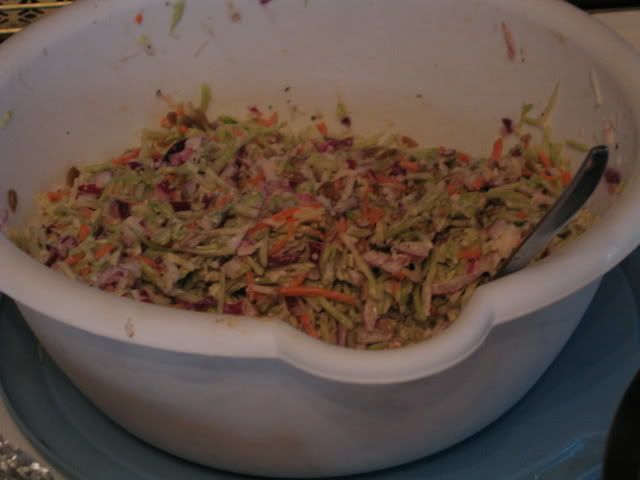
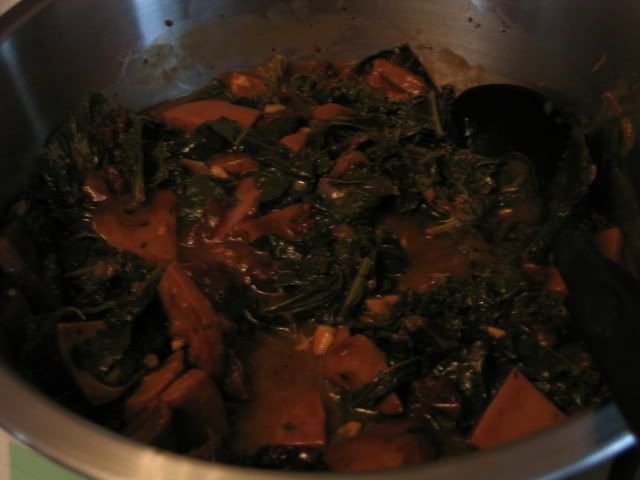
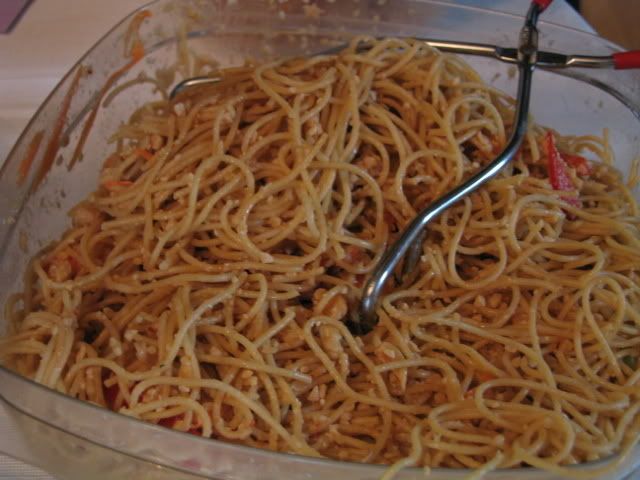
Sunday was the big Vegan Potluck chez Megatarian! We had awesome company and great food. Here are the pictures from the big event. I don't have recipes for all of them (and right now I'm not even going to try for the ones I made) but if people want to contribute recipes for what they've made, feel free to add 'em in comments!
Garlic Mashed Potatoes
Pomegranate BBQ Seitan
Pasta Salad
Rosemary Focaccia with Sea Salt
Foofie's Mystery Artichoke Salad
Chickpea Salad
Veggie Slaw
Black Bean Salad
Braised Seitan and Kale with Sundried Tomatoes
Cashew and Sesame Noodles
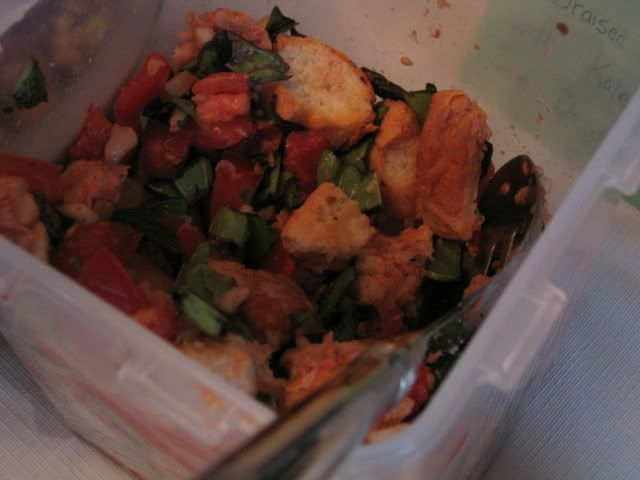
Panzanella Salad
DESSERTS!
Oatmeal Cookie with Brown Sugar Cinnamon Ice Cream
Strawberry Chocolate Cookies with Strawberry Ice Cream
Chocolate Chip Cookies with Vanilla Bean Ice Cream
Yellow Cake with Tofu Chocolate Mousse
Lemon Cake with Blueberry
Oatmeal Craisin Cookies
THE WHOLE GANG! (minus boyfriends)
Sunday, July 13, 2008
Sushi Salad -- Another Lunchbox
I really enjoyed having the tofu and mushrooms in my lunch last week, and decided that I wanted it in my lunch again this week. I was trying to figure out what sort of something I could make to go with it, and I thought that Sushi sounded good with tofu and mushrooms, but Sushi is a bit of a project to make, and expensive to buy. The wheels turned though, and I thought why not incorporate all my favorite things about sushi into a rice salad. It is awesome. I brought a spoonful to the boy to try and he ate it and said "OH MY GOD THAT'S GOOD!! Did you make enough for me??" This recipe, in fact, makes enough for about two lunch sized servings of Sushi salad, which works out perfect for me since I work two 10 hour days a week. I eyeballed a lot of this, of course, but paid close attention to what I was doing so that I could record the recipe if it came out well. Another advantage to this salad compared to sushi is that you can use brown rice since it doesn't need to stick! The veggies could be easily changed out to other sushi-type veggies, so if cucumber and avocado aren't your thing, give something else a try!
This week's lunch box features, from top right clockwise, assorted fruit, two vanilla joe-joe's,
browned tofu and shiitake mushrooms in an Asian style marinade, and Sushi Salad
Sushi Salad
1/2 cup short grain brown rice
1 cup water
1 tsp dark sesame oil
1 tsp rice vinegar
1/2 tsp sugar
1/4 tsp salt
2 tsp soy sauce
1/2 tsp grated ginger
2 tsp sesame seeds
1 sheet nori, cut or torn into small pieces
1/2 avocado, diced
1/2 cup cucumber, diced
5 baby carrots, grated
1. In a medium sized pot over high heat, heat the sesame oil and add the brown rice. Stir and keep stirring for about 2-3 minutes until the rice begins to toast (will smell nice and toasty!). Add the 1 cup of water and stir. Bring the water to a boil, then reduce the heat to low, cover and simmer for 45 minutes or until water is absorbed and rice is tender.
2. Add the vinegar, sugar, salt, soy sauce, ginger and sesame seeds to the rice and stir well to mix.
3. Fold in the vegetables and nori. Taste and adjust seasoning to taste.
Monday, July 7, 2008
What's for Lunch?
I decided to take a picture of my lunch box today while I was photographing other foodstuffs in the kitchen. This is fairly typical for a lunch for me. I use a Laptop Lunchbox because I like the portion controlling and because I don't have to waste a lot of baggies and things. I usually fill one large container with a "main dish" which generally has some sort of whole grain, protein, and veggies (usually dinner leftovers), one small container with raw veggies, the closed container with fruit, and the last small container with dessert. This is slightly different since I didn't have a protein in the large container, so I put one in one of the small ones.
Clockwise from top left:
Cantaloupe, strawberries and blueberries
Blueberry Lemon Bread
Browned tofu and crimini mushrooms
Pasta salad
I made the pasta salad specifically to bring for lunches this week. I don't have a recipe since I sort of winged it as I went along, but this is about what I used...
1/4 lbs dilatini pasta, cooked and drained, tossed with...
1/2 cup frozen peas, thawed
1/4 cup corn
1/2 large stalk celery, diced
6 baby carrots, diced
1/4 red bell pepper, diced
6 black olives, diced
1 tbsp olive oil
1 tsp balsamic vinegar
1 tbsp tahini
1 tbsp nutritional yeast
1 tsp dry basil
Salt and pepper
I would have put in some garlic powder but I was fresh out. It's really yummy. I had to put it away as soon as I was done making it because I was going to keep nibbling, and I wanted to save it for lunches!
Blueberry-Lemon Bread
Fresh berries are one of my favorite parts of summer. I bought a pint of blueberries last weekend and excitedly made myself a bowl of hot cereal for breakfast, topped it with the blueberries and some nuts and maple syrup, took a nice big bite and... nothing. I took another bite. Squishy like blueberries, but completely void of flavor. How did I manage to get flavorless blueberries in July?? It was a tragedy for sure. They've been sitting in my fridge ever since as I tried to find a use for them. I had study group at my house this morning, and was thinking about making cranberry-orange bread from Veganomicon since I had cranberries in my freezer, and an orange or two, but decided instead to try it with lemon and the blueberries, since cooking them should theoretically concentrate their flavor a bit. After I rinsed the blueberries I tossed them with a bit of powdered sugar to sweeten them up, and the bread came out DELICIOUS! It's really zippy and lemony without being sour, and you can actually taste the blueberries! It would be so much MORE delicious with really yummy blueberries to start with, but this was a good solution and yielded great results! And so, another recipe altered from Veganomicon (though I do also recommend the original!)
Blueberry Lemon Bread
1/2 cup rice milk
1/4 cup fresh squeezed lemon juice (about 2 lemons, depending on size and juiciness)
1/4 cup canola oil
1 cup sugar
1 tsp vanilla extract
1 cup all purpose flour
1 cup white whole wheat flour
1 1/4 tsp baking powder
1/2 tsp baking soda
1/2 tsp salt
1/4 tsp ground allspice
1 tbsp grated lemon zest
1 cup blueberries
Preheat the oven to 325 degrees.
1. Mix together the milk, juice, oil and sugar in a large bowl.
2. Stir in the dry ingredients until just mixed.
3. Fold in the zest and blueberries.
4. Pour the batter into a greased 9X5 inch loaf pan.
5. Bake for one hour or until toothpick inserted into the center comes out clean.
Tofu Quiche with Hashbrown Crust
A week or so ago I stopped into the grocery store to pick up a few things we needed. An employee stopped me and asked if I was going to spend $7.50. Glancing at my list, I said "Yes, probably" and she replied with "Want some free potatoes??" and extended a five pound bag and a bright yellow coupon in my direction. "Uhh.. ok.." I replied and took the potatoes. I don't normally buy potatoes in that quantity simply because I know we won't eat them all before they get eyes, and in my house, for whatever reason, tubers sprout like crazy almost instantly. But you can't wave a free vegetable in front a vegetarian and have them say no, so since then I've been trying to figure out healthy ways of incorporating them into our dinners before they go to waste. This is even more challenging because I loathe baked, boiled, or mashed potatoes, and potato salad. I really only like them roasted or fried, and I don't mind them too much in soup. This weekend on the Food Network, Paula Dean made a quiche with a hashbrown crust and I thought that might be a good use of some of the potatoes! Of course she used butter, and eggs, and cheese... and frozen hash browns... but conceptually I was in. This isn't necessarily the most photogenic bit of dinner, but it really was yummy! As a bonus, it used up some random veggie bits from my fridge, and some of the taters!
Tofu Quiche with Hash Brown Crust
For the crust:
3 cups grated potatoes
2 tbsp margarine
2 tbsp olive oil
1. Preheat the oven to 450 degrees.
2. Spray your pie pan with nonstick cooking spray
3. Grate the potatoes and toss with the oil and margarine to coat. Press the potatoes in the bottom and up the sides of a 9 inch pie plate and bake for 20-25 minutes or until the potatoes are getting golden brown.
For the filling:
1 (1 lbs?) box of silken tofu (I used Nasoya)
1 cup plain rice milk
1/2 tsp turmeric
2 tbsp nutritional yeast
1 tbsp dijon mustard
2 cups broccoli, chopped
1/2 bell pepper, diced
1 clove of garlic, minced
1 tbsp oil
1 cup soy mozzarella
salt and pepper to taste
1. Heat the oil in a large skillet over medium heat and sautee the broccoli, bell pepper, and sautee until fork tender.
2. Meanwhile, blend together the tofu, milk, turmeric, nutritional yeast, mustard, and salt and pepper.
3. When the Hash Brown Crust is finished baking, put the veggies in the bottom of the crust. Top with the cheeze, then pour the tofu mixture evenly over the top.
4. Bake the quiche in a 375 degree oven for about 45 minutes until the tofu is set and starting to brown. It will still be a little jiggly coming out of the oven. Allow to cool at least 10 minutes before cutting.
Of course you can change up the veggies and cheeze and seasoning as desired. Onions or mushrooms would probably be nice in it.
Subscribe to:
Posts (Atom)