Monday, December 7, 2009

Carrot Ginger Soup

The first time I made carrot ginger soup was a few years back and I had a dreadful head cold, and for whatever reason, C-G soup sounded fantastic. I'd never had it before, but something about a creamy soup with a lot of ginger just seemed the right thing, and it totally was, and was absolutely delicious. Then I moved in with The Boy who was decidedly anti-ginger and I didn't make it again, but the thought was creeping more and more into my head as the weather got cooler here. Last month I was invited to a potluck and I thought that would be the perfect chance to make it again, without subjecting The Boy to the soup. Well turns out he loved it. He tasted it when I was done making it and wanted more. I had some leftover after the potluck and he ate it all. The carrot ginger floodgates are now open and I can make it as often as I please!!

Most recently, I made it for my mom and sister when they came up to visit. This is a soup I didn't have a recipe for that I liked, so I just sort of winged it, and wrote it down as best I could as I went along. Everyone who's eaten it so far has loved it. It's great plain or with a little bit of chopped fresh dill sprinkled on the top. I recommend using organic carrots for this recipe because carrots are really excellent at soaking up toxins in soil. It's one of the few veggies I spend the extra money on and buy organic, though they really still aren't a horrible financial burden. Another new thing for me -- freshly grated nutmeg. For years I went "yea yea sure fine" and used the preground. Recently I bought a few whole nutmegs to try, figuring I had the microplane now, might as well since I like seeing what that'll grate up and WOW what a difference! It's almost like a different spice. Definitely give it a go if you can.

Carrot Ginger Soup
2 ribs of celery, roughly chopped
2 small shallots, roughly chopped
2 tbsp vegan margarine
2 lbs carrots, peeled and cut into coins (or! Shortcut! 2 lbs of baby cut carrots)
5 cups vegetable broth (or, 4 cups + 1 cup of water if you buy it by the quart)
3 inch piece of ginger, peeled and roughly chopped
1/4 tsp fresh ground nutmeg
1/4 tsp ground cumin
1/8 tsp ground cinnamon
1 tbsp maple syrup
1 cup mimicreme (vegan nut-based heavy cream - though an unsweetened plain soy, rice, almond, whatevermilk would also work fine)

1. Melt the margarine in a large soup pot and sautee the shallots and celery until it begins to get tender.

2. Add the carrots, broth, ginger, and spices and bring to a boil. Lower the heat to a simmer, cover, and cook for about 30 minutes or until the carrots are super soft (this will depend on how small you cut them).

3. Take the soup off the heat and either puree it in the pot with an immersion blender (easier choice) or puree it in batches in a blender (making sure to allow for steam to escape or your blender top with blow off) until it's perfectly smooth.

4. Return the soup to the pot if you took it out, and add the maple syrup and milk. Season with salt and pepper to taste. Serve with fresh dill, if desired.


Shown with a sprinkling of Dill

Monday, November 30, 2009

Pretzels! or Let's Get Twisted!!

Recently I got struck with this insane craving for a fresh hot soft pretzel with mustard. I couldn't get the idea out of my head so clearly I had only one choice!

Drive to the mall?!
No. Those are dipped in butter aren't they?

Buy some frozen?!
No! They get dry and stale and freezer-burned so fast.

Make my own?!
Of course, where did you think this was going? It's a food blog.

Fortunately pretzels are both easy and fun to make, and pretzel recipes don't require much veganization as they don't have a lot of animal bits in them. I used Alton Brown's recipe off the Food Network website. The only changes I had to make were subbing Earth Balance for butter, and omitting the eggwash, which is supposed to give them a nice golden brown color. Seems if you just sprinkle salt onto the wet pretzel and put them into a hot oven, they do actually turn golden brown on their own. Go figure!! These were so delicious the boy and I ate way too many pretzels in one go, but you really have to enjoy them while they're hot and fresh since they get stale so quickly. Like bagels, hot pretzels are boiled and then baked to give them a chewy interior and a crisp exterior.


Soft Pretzels
1 1/2 cups warm water (110-115 degrees F - should feel just barely uncomfortable)
1 tbsp sugar
2 tsp salt
2 1/4 tsp (one packet for those of you who don't buy bulk yeast) active dry yeast
22 oz (about 4.5 cups) all purpose flour
2 tbsp margarine, melted
10 cups water
2/3 cup baking soda
Vegetable oil to non-stick up your bowl and cookie sheet
Parchment paper if you've got it
Rock salt/Pretzel salt


1. "Proof" your yeast (test to make sure it's active) by adding it and the sugar to the warm water and allow it to sit for about 10 minutes. If it gets all bubbley and foamy looking, it's ready to go! If nothing happens, it may be time for new yeast.

2. Stir your flour and salt together in the bowl of your mixer (or in a large bowl if you're going to knead by hand). Add the water/yeast mixture and the melted margarine and mix until it is combined well, then knead the dough for about 5 minutes until it's smooth and elastic.

3. Lightly coat your bowl with vegetable oil and place the dough ball back into the bowl. Cover loosely with plastic wrap and leave in a warmish spot for an hour, or until the dough about doubles in size.

4. When it's getting towards the end of the rising time, you can start prepping the rest of your things. Line the cookie sheets with parchment (or foil, or silpat, or nothing) and lightly brush with vegetable oil. In a large pot, bring the 10 cups of water and 2/3 cups baking soda to a boil. Preheat the oven to 450 degrees.

5. Back to the dough! Punch it down and divide it into 8 balls of dough. Roll each ball into a rope, and twist each rope into a pretzel. (Make a U shape, then cross the ends, then stick the bottoms onto the original U shape.) One at a time, gently place the pretzels into the boiling water for 30 seconds, then remove them with a slotted spoon and sit them on your prepared baking sheet and sprinkle with salt.

6. Bake your pretzels for 12-14 minutes or until they're all golden. Allow them to cool a few minutes on a cooling rack before you eat them.

Sunday, November 1, 2009

Individual Baked Apple Crisps

Another chapter in the 1001 things you can do with apples! But first...

Next weekend is the SECOND ANNUAL PRE-THANKSGIVING VEGAN THANKSGIVING POTLUCK here in the Albany, NY area. More specifically, in my house. If you are in or around or willing to travel to the NY State Capital Region, and are free on Saturday, November 7th from 2pm until we can't move anymore, and want to share some awesome vegan food, let me know and I'll send you further details!

Onto the apples!

I was a whiny mess last week when I was sick, so I wanted to make a nice treat for the boy because he put up with me. With just the two of us, making an entire apple crisp or an entire apple pie is just a bit much, and while I love baked apples, the boy typically would prefer a dessert with a bit more pizazz. These turned great. They were super simple to make, and really delicious! I didn't have a recipe, I just winged it based on the size of the apples and the proportion of stuff I wanted to put inside of them. Dried fruit or chopped nuts would also make great additions to the filling if you've got them around.


Individual Baked Apple Crisps

2 large apples
1 tbsp vegan margarine, melted
2 tbsp dark brown sugar
1/2 tsp ground cinnamon
Heaping 1/4 cup rolled oats

1. Peel a band of skin off of the outside of each apple. Cut a hole into the top of the apple as though you were cutting a pumpkin for carving. Scoop out the seeds and core, leaving just a little bit of apple at the bottom to help hold the filling in. Snack on the extra apple bits that came out.

2. In a small bowl, mix the brown sugar and cinnamon into the melted butter to dissolve the sugar, then add the oats and stir to coat in the sugar/margarine mixture.

3. Fill the empty apples with the filling and bake at 350 degrees for about 45 min to 1 hr or until the apples are tender when poked with a fork. (This will depend on the size of your apple!) Serve warm for optimal deliciousness.

Tuesday, October 27, 2009

Recipe Mix & Match

I have been delinquent. I haven't actually cooked at all since the last day I posted because I've been sick. I'm still not feeling 100% but I'm certainly doing better than I was last week. I was going to post my method for crispy tofu, but it seems those pics are still on my camera, and the battery is charging right now, so I thought instead I'd show you my creative recipe combining to make a new recipe.

My wonderful friends came and watched my cats for us while we went downstate for Nana's bday last weekend, and so I paid them like you pay any good friend pet-sitters -- in baked goods. The request this time was for chocolate brownies with chocolate chips and peanut butter frosting. I looked through my different cookbooks to find recipes that would fulfill this need and ended up choosing the Chocolate Brownie recipe from The Joy of Vegan Baking and to top it, I made the Peanut Butter Caramel from the apple bars in Veganomicon. The results??


Delicious! I didn't realized until I'd mixed up the ingredients for the brownie batter that it was, essentially, a fat free brownie recipe. Not that that makes it healthy... but I was worried that they wouldn't be rich enough. I was wrong, they were definitely rich enough!! The recipes says that they'll be fudgy if cooked for the instructed time, but I had to bake them for an extra 10 minutes because the middle of the pan was absolute liquid when the timer went off. They weren't totally fudgy, they definitely had a cakey feel to them, but they were definitely a brownie and not a cake! The peanut butter caramel frosting paired very well with them. It made them nice and gooey and sticky and delicious.


The moral of this story is don't be afraid to just take parts of recipes that you like and put them together to make new recipes! The results could just be delicious!

Crispy Tofu

And so, this is the last meal I cooked last Tuesday before I got sick. This isn't really a recipe as much as it is a method for getting some nice crispy tofu!

One step that I'm leaving out of this is the draining/pressing step, which should happen before you marinate your tofu. The tofu I use is made by The Bridge (http://bridgetofu.com/). If you can get your hands on this stuff, definitely do. It is so creamy and firm it doesn't need to be pressed. People who eat my tofu think I've done something magical to it, but really, I've just used that awesome tofu.

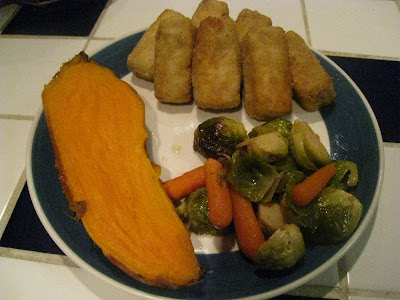
Anyway, the reason behind this meal was the boy was "mmmm"ing over the thought of mashed potatoes and gravy, so I had to figure out a meal around them. I especially do not like mashed potatoes, so it had to be something where I could enjoy an alternate side. And so, I marinated the tofu in a "gravy marinade" ( strongly concentrated unchicken broth, tamari, nutritional yeast, poultry seasoning) which I later thinned with some more water (so the taste wasn't so strong) and then thickened with a roux (so that we weren't pouring broth over our food!) and it multitasked as a really excellent gravy. I had my crispy tofu with cider roasted brussels sprouts and baby carrots and a baked sweet potato. The boy, of course, had mashed potatoes in lieu of the sweet tater. It was really yummy and had a very chicken-nugget esque feel to it. I think next time I'll cut the tofu thinner/smaller, but otherwise this was the best crispy tofu to date.


The method for this was as follows:

Cut the tofu in whatever size you like and marinate it in whatever you like. Put about a cup of rice flour into a large bowl. Season in generously with salt, pepper, and whatever else you like (I used poultry seasoning). Toss the tofu in the rice flour a few at a time to coat, then dip them in the marinade again, then toss them around in the rice flour again until they are thoroughly coated. Heat about a centimeter of oil in a cast iron skillet over medium-high heat and place the tofu in to the pan. Cook the tofu until it's golden brown, then rotate it to another side. Keep browning sides and rotating until all sides are cook. Take out and allow to train a bit on brown paper or paper towels. Enjoy while hot and crispy.

Tuesday, October 20, 2009

Many Cakes

As predicted, I did not get a chance to post all weekend. The boy and I went downstate Friday and came back Monday, only to have to rush and prep dinner for seven, as his extended family was visiting his parents and they wanted to come see the house. I was cooking the entire time I was away pretty much though, so I do have a few pictures to share.

My Nana turned 90 over the weekend, and wanted a big party, hence my trip downstate. I helped cook a bunch of stuff including two cakes. I used Vegan Cupcakes Take Over The World recipes and made 9 inch round cakes. Each one recipe of cupcakes makes one layer of an 8 or 9 inch round cake, if you ever want to convert them. It tends to take an extra 10 minutes or so in the oven, but they bake up just fine!

This first cake is a hazelnut cake with raspberry filling, vanilla butter cream, and chocolate ganache. The raspberry filling is from the Raspberry chocolate chip blondie recipe out of Vegan with a Vengeance. This cake had a major structural problem and the entire back end pulled out from under it when I tried to remove the wax paper (to protect the serving platter) after I decorated the cake, hence the downward slope in the back.


The second cake was a Vanilla Agave cake with Lemon Buttercream decorated with pomegranate seeds, blueberries, strawberries and kiwis.

And, while many guests commented on how beautiful they were, the cakes mostly went untouched in favor of this bakery monstrosity: (And it's not even because it was "ew vegan cake" or anything since no one knew it but my immediate family)

My dad did say my vanilla agave cake with lemon frosting was the best tasting of all 3 of them :P

Ahem, moving right along...

Last night for dessert I made a pumpkin chocolate chip cake with cinnamon cream cheese frosting. It was super yummy and really moist, despite the cake having been made a solid week ago and frozen (made the frosting fresh last night). The decorating left a bit to be desired, but after the other two this weekend, I was about fancied out, so it's just drizzled with chocolate and sprinkled with fall themed sprinkles.


Here's a graphic inside shot for you folks who are into that sort of thing:

And so, that is my tale of three cakes. I think I'm just about caked out for a while now!!

Thursday, October 15, 2009

Not-Quite Zucchini Bread

HEY MEGATARIAN!! What's with all the breads??

I dunno, it's cold out, I'm baking again.

My last run of squash this summer were pattypans. I ended up with more than I knew what to do with, and despite giving a bunch away, I still had a bunch of pattypans in my fridge. I'm down to the last couple now, and instead of throwing one into a stir fry like I normally would, I thought it might be nice to bake a loaf of zucchini bread.

Only without zucchini.

Pattypan is just another type of summer squash. They look sort of like scalloped flying saucers. They're in the top right of this picture of one of my garden hauls taken in August:

Back on topic: I mutated this recipe from vegweb for zucchini bread into pattypan squash bread with blueberries, but certainly you could use zucchini, or any other summer squash you have handy.

"Before"
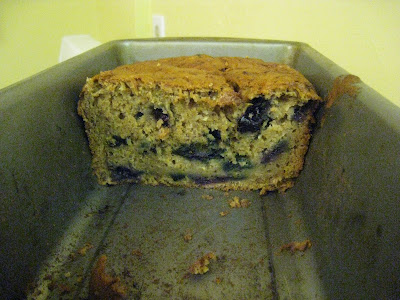
"After"

Summer Squash Bread with Blueberries
1 tbsp ground flax seeds
3 tbsp water
1 cup sugar
1/2 cup vegetable oil
3/4 cup ~milk (soy/rice/almond/whatever's open in your fridge)
1 tsp vanilla extract
1 3/4 cups white whole wheat flour/whole wheat pastry flour
3/4 tsp baking soda
1/4 + 1/8 tsp baking powder
3/4 tsp salt
1 tsp ground cinnamon
large pinch ground nutmeg
large pinch ground cloves
1 1/2 cups grated summer squash
1 cup fresh or frozen blueberries

1. Preheat the oven to 350 degrees. Lightly grease a loaf pan.

2. Combine the flax and water and let it sit for about 10 minutes to get goopy. (This is a good time to grate your squash)

3. Combine the flax goo, sugar, oil, ~milk, and vanilla in a large bowl. Stir in the dry ingredients until just mixed. Fold in the squash and blueberries, then pour into the pan.

4. Bake for one hour or until a toothpick inserted into the center comes out clean.

And on an unrelated note, I'll be gone tomorrow through Monday visiting my parents downstate, and helping with/attending my Nana's 90th birthday party. I will be cooking a bunch, but I don't know how much time I'll have to blog. I'll try my best! Don't be too sad if I'm gone a few days ;) I'm just surprised I got through half the month so far!!

Wednesday, October 14, 2009

Irish Soda Bread

Getting back to the Scottish stew I never got to eat this week, I also baked some Irish Soda Bread to go with it, which I did get to eat. It was a sort of disjointed tribute to the UK or something. I love homemade bread in any form. The benefit of doing soda bread is, of course, you don't have to knead it for more than a minute and you don't have to wait for it to rise. You can have the whole shebang in the oven in about five minutes.

I had a lot of issues to consider when making this bread... raisins or no raisins? Half raisins? All whole wheat, half whole wheat, no whole what? One recipe? A half recipe? Which recipe? In the end I made a half recipe of the Soda Bread from The Joy of Vegan Baking, all whole wheat, no raisins. My only mistake with the half recipe part. I saw 4 cups of flour and 2 cups of milk and thought it would make much too much bread for the two of us, and it totally would have, half was plenty for two with some left over... but mmm homemade bread?! I should have made more. But of course, it's so fast and easy I could just throw another loaf in the oven and bake it up anytime I like :) I didn't make too many changes to the original recipe other than halving it, and using white whole wheat flour instead of all purpose flour, and I used apple cider vinegar instead of white vinegar (I really feel like that's more for cleaning than eating! ACV is so much milder. Plus I only have white vinegar in a gallon jug and I thought pouring a tsp out of that would be a mess). Also I used soymilk when you can use "any milk" but soymilk curdles so much better than rice or almond. And so, here's a recipe for a small loaf of soda bread adapted from JOVB.


Irish Soda Bread
1 cup soymilk
1 tsp apple cider vinegar
2 cups white whole wheat flour + a little extra if the dough is too sticky
1/2 tsp baking soda
1 tsp salt
2 tbsp melted earth balance or other margarine of your choice

1. Preheat the oven to 425 degrees and lightly grease a round cake pan (it can be way bigger than your final loaf, it's just a place for it to bake)

2. In a small bowl, combine the soymilk and vinegar and leave it to curdle for a few minutes.

3. In a large mixing bowl, combine the dry ingredients.

4. Mix the wet ingredients (margarine, milk mixture) with the dry and stir until you have a sticky dough.

... This is the point where I deviate from the recipe some more. The dough was WAY sticky for me. Like a thick cake batter sticky. I needed to add about 1/4 cup more flour to get it sticky, but into a ballable dough. Baker beware!

5. Knead the dough about a dozen times, form it into a ball, put it in the pan, and cut an X into the top with a serrated knife.

6. Bake for 40-45 minutes until the crust is golden and it sounds hollow inside if you knock on it.

7. Eat a slice as soon as it's cool enough to handle!! The fresh crust is so delicious!

Tuesday, October 13, 2009

Black Bean Burgers and Oven Fries

This week is actually a slow week for cooking dinners. I thought Sunday and Monday night's dinners would carry us with leftovers for more of the week, Sunday being the Ziti and last night I made Scottish Broth (stew) out of The Vegan Table, though the boy ate the entire batch of it so I can't even say how it tasted because I didn't get a bowl. Ahem. So that's all gone. We're going away for the weekend on Friday, and the boy is out Wednesday nights so I don't make a proper dinner, so this is about it for me cooking this week. We have about a million hamburger buns in the freezer from our labor day BBQ, so I decided to put some to use and I made black bean burgers with sweet potato oven fries for dinner. Black beans and sweet potatoes go so well together. I'm going to avoid once again professing my love for the humble sweet potato, and just say damn it's a match made in heaven.

I used the Black Bean Burger recipe out of Veganomicon with only one real change -- I used red bell pepper instead of onion. It's about the same, right? Well anyway, it looks pretty and keeps with the southwestern theme. They came out a little underdone in the pan, though they were browning up nicely, but I found baking them a little extra in a 350 degree oven finished them up nicely so you didn't get a chewy gluten blob. Since I so just barely altered this recipe, I'll leave it to everyone to go grab their copy of V'con, turn to page 98, and make it themselves!

Burger! Ketchup! Avocado! Fries!

And to make up for a recipe-free post, here's a picture of two of my cats making out.

Atticus in Black, Sir Didymus in Orange Tabby

Monday, October 12, 2009

Apple Sauce? Easysauce!

I live in apple country.

I guess there are several parts of the US that constitute "apple country" -- I live in the "capital region" of NY (which apparently is not upstate, and is also not central, and is also not downstate.. though to me it IS upstate because I grew up outside of the city and this is well north of that), and so that means I've been wolfing down LOTS of local apples. It kills me that you can't buy local apples in the regular supermarkets. I mean, you can drive like 20 minutes to an apple orchard and pick your own, but the supermarket apples are from Washington State (Not that there's anything wrong with Washington state apples, but CARBON FOOTPRINT FOLKS) and other countries, oddly. I buy mine from the co-op. They aren't coated in wax and gross and overly shiny, and they're always super fresh. In addition to the "nice" apples, they also sell "utility grade" apples for $.49/lbs (which is more like $.36/lbs when my discount is factored in). These are my favorites for making apple sauce. They're perfectly fine, especially once peeled, and make absolutely delicious apple sauce. Apple sauce is among the easiest things to make (even easier than tomato sauce!), and nothing compares to homemade! I mix and match different apple varieties, so use whatever you like!

Before

After

Apple Sauce
8 Apples, peeled, cored, and rough cut into pieces
1/2 cup water
1 tsp lemon juice
1/2 tsp ground cinnamon

1. Put the apples and water in a 3 qt sauce pan and turn the heat to medium, and cover. Cook for about 45 minutes to an hour depending on the size of your apples and how chunky you like your sauce. Check on it regularly and stir, especially for the first 15 minutes, and make sure it isn't bubbling up over the top of the pot or anything. Keep turning the heat down if it's bubbling too high!

2. Turn off the heat and stir in the cinnamon and lemon juice. The more you stir the smoother the sauce will be.

(Yea, that's it. Easysauce!)

Sunday, October 11, 2009

Tomato Sauce and What it Became

I grew up in an omni household, but not one that ate the Standard American Diet (SAD). My father rejected all things convenience food (though my mom was able to sneak in Rice-a-Roni type things) and insisted on having at least one fresh (not canned, not frozen) lightly cooked vegetable at dinner every night. We also ate tofu on a regular basis, only we called it "bean curd" and even my brother's guy friends got all excited if they were over for dinner on bean curd night. It was certainly not your average household, but it set me up well for vegetarianism. One thing that we made at home probably at least once a week was a big vat of Tomato Sauce. I knew how to make the sauce before I was a teenager and would often be assigned the task. We never measured anything, just dumped it what looked right. Now as an adult I'm like "pfft whatever" most of the time. If I'm making spaghetti in tomato sauce, then it's because I'm feeling lazy and would rather just open a jar of sauce than make it from scratch. Tonight's dinner, however, was rather convenience-foody for us, so I decided to make the sauce from scratch. It's really pretty simple, and I tried to measure as I go so this could be replicated by other people who want to make really easy tomato sauce at home. My favorite canned tomatoes for the task are Muir Glen Organics. They are really delicious and fresh tasting. They aren't cheap though, so I try to stock up when they're on sale. (They also make jarred tomato sauces, but I don't really like them, oddly)


"Oh hey Megan, don't you think you should have taken the picture before you started using the sauce?"

Tomato Sauce
2 tbsp olive oil
3 cloves of garlic, minced
1 28-oz can of crushed tomatoes
1 28-oz can diced tomatoes
1 tsp dried oregano
1 tsp dried basil
1/2 tsp dried parsley
1/2 tsp sugar
Salt & Pepper to taste

1. In a 3 quart saucepan, heat the oil and garlic over medium-low heat until the garlic starts to sizzle and becomes fragrant. (DO NOT let the garlic brown! It will be bitter and you'll have to wash your pan and start over)

2. Add everything else. (Didn't I say easy?) Simmer over medium heat for about 45 minutes to an hour. Use, however you want to use it. If you like a smoother sauce, either use 2 cans of crushed tomatoes or puree it a bit with your immersion blender.

I used it in this:
Pizza baked ziti!! It's a pound of pasta, the tomato sauce, a batch of tofu-ricotta, a block of Follow Your Heart Mozzarella, and a package of Veggie-Pepperoni. It was also supposed to have roasted red peppers but I couldn't get the jar open. Now if I were making this for JUST ME and not the boy as well, it would also have mushrooms, olives, and artichoke hearts. Mmm pizza toppings in ziti.

Saturday, October 10, 2009

Mini Pumpkin Pies with Brown Sugar-Walnut Topping

Two Christmases ago I ordered some kitchen related gifts from amazon.com for my sister, and they had a deal where if you ordered kitchen stuff you got a free subscription to either Gourmet Magazine or Bon Appetit Magazine. I ordered free Gourmet Magazine and it was a megatarian hell. They did have ONE vegetarian dish per issue but it was always very cheese or egg laden. A few other things were coincidentally vegetarian, but nothing really interesting. This past Christmas, same deal, only this time I chose Bon Appetit. Honestly, it's not much better. I've given away most of my issues from this year thus far, though I did photocopy a section about bar cookies that I thought I might veganize. This months issue was the Thanksgiving issue and surprisingly, it has several accidentally vegan or easily veganized side dishes and desserts! One in particular that caught my eye was Pumpkin Pie with Brown Sugar-Walnut Topping. Since the boy is off playing D&D all weekend, I had some friends over and we turned this recipe into Mini Pies using Keebler graham cracker mini crusts, which are accidentally vegan, but do contain trans fats (boo). I had them leftover from something and sitting around my pantry forever so I thought I'd use them up. We veganized the recipe, and only made a half batch of filling and topping, and it made six perfect mini pies. The filling was nice and creamy and well spiced and the sweet nut topping complimented it well. While the original recipe called for just a normal pie crust, the graham crust worked out just fine. If you wanted to make this into a whole pie, just double the recipe!

Mini Pumpkin Pies with Brown Sugar-Walnut Topping
Crust:
One 6 pack of mini graham cracker pie crusts
Topping:
1/4 cup walnuts
2 tbsp brown sugar
1/4 tsp ground cinnamon
Filling:
1/2 cup brown sugar
1/4 cup plain or vanilla soy yogurt
1/4 tsp salt
1/4 tsp ground cinnamon
1/4 tsp ground ginger
1/8 tsp ground cloves
1/2 cup canned pumpkin (not pumpkin pie filling!)
1/2 cup soy creamer
2 tbsp cornstarch

1. Preheat the oven to 350 degrees.

2. In a blender or food processor, process the nuts, brown sugar and cinnamon together until the nuts are ground into fine crumbs.

3. In a large bowl, whisk together all the filling ingredients until smooth.

4. Divide the filling evenly between the 6 cups (place them on a baking sheet to make transfers in and out of the oven easier!) and bake for 30 minutes.

5. Lower the oven temperature to 325, remove the pies and sprinkle with the topping them put them back into the oven to bake for about another 15 minutes, until the middle is puffy and they're set.

6. Allow the pies to rest at room temperature at least an hour before serving. (If you're making a big pie, it might need to rest/chill longer to be able to slice in neat slices... all the more reason to make mini pies!)

Friday, October 9, 2009

Inside the Megatarian Fridge

I realized after I captioned these pictures that I really should have, oh, I don't know, cleaned out my fridge before I photographed it?? I swear it's on my to-do list, as it is in a bit of a state of chaos right now, but I thought it might be interesting for people to see how I stock my fridge. I always like looking in other people's fridges. It's interesting stuff! On the other hand, my second mistake was that this is the end of the grocery week as I'll go shopping tomorrow so... I may have to do this again some other time.

You should be able to click these images and check them out much bigger.

This is the outside:
Unfortunately the ice/water dispenser on the door doesn't work. It may or may not need a new water pump. Other bits on the fridge include instructions on how to clean the kitchen (*sigh* living with a boy), my congratulations letter from being accepted into candidacy, the info on where we have to take my ring to get it appraised, some receipts, a tai kwon do schedule, and a garbage/recycling schedule.

Then this is the inside...
As you can see there are some non-vegan bits in there that belong to the boy. In this case, there's a carton of milk and several types of mayo. There's also a couple cans of cat food. I tried to label some of the more ambiguous stuff. The freezer has a bunch of veggies, some stock, some ice creams, pestos, ice pops, nuts, and a large bag of stuff I need to take out to the compost pile.

On the fridge side we have a ridiculous number of condiments. There's leftover chili, salad, and soup, almond milk, tofu, some more nuts, some veggie cheese and tofutti cream cheese that really has been hiding in there forever and should probably go. I've got both Earth Balance and Smart Balance light, though SB-l is seriously inferior. I just thought I'd try it cause it was cheaper. Bleh. One of my new buys this week was a few quarts of GoodBelly juice because, as everyone who knows me knows, I do not have a good belly. It's a probiotic juice drink and they guarantee you'll feel uber in 12 days or your money back!! So far, I'm on day 2. It's not bad stuff, a little thick and slightly gritty from the oat fiber, but definitely drinkable. TAKE THAT ACTIVIA with your MILK and your GELATIN! I may end up making a GoodBelly review post at some point, maybe at day 12 at which time I'll know whether or not I need my money back. It has neither helped nor hurt me yet, so I might as well press on with it. Ahem, back on topic. The veggie drawers contain veggies, though at this juncture it's mostly carrots and celery and some herbs and still more damn squash from the garden! Fruit is all on the counter this week - apples, pears and bananas.

Perhaps for my next tour I'll take you to *dum dumm* The PANTRY!!! :D

Thursday, October 8, 2009

Sweet & Sour Tofu

My latest cookbook acquisition was The Vegan Table by Colleen Patrick-Goudreau, author of The Joy of Vegan Baking. It's a really nice book with lots of color pictures of the dishes. It took me a while to get used to the format, which organizes the dishes according to what sort of dinner party you'll be having and not necessarily by course, but I got over that and have been enjoying it for the past few months. My most recent recipe trial was for the Sweet & Sour Tempeh, only tempeh and I don't get along. I don't like it, and it makes me sick. We've decided to call a truce and tempeh is no longer part of my life. The recipe suggested tofu if one isn't a tempeh fan, so I went that route. The other change I made to the recipe was leaving out the red pepper flakes because spicy doesn't agree with me either, though I can see how they would go well in the sauce. I also used more green beans than the recipe called for because I have them coming out my ears from the garden... and I left out the onion and used a small pattypan squash instead. That's pretty much the same thing, right? I tossed the tofu around in some rice flour and pan fried it to give it a nice crispy crust before mixing it with the veggies and sauce. Overall, I was very happy with this dish! The apricot sweet and sour sauce was very yummy and it went well with the tofu and vegetables. I thought it was going to be too much sauce, but it worked out well over rice. I think my main criticism would be the number of pots and dishes it took to make this!! But I just hate doing dishes.


Sweet & Sour Tofu
1 lbs tofu, cubed
1/2 cup rice flour
Canola oil for pan frying
1 cup + 3 tbsp of water
1 inch piece of ginger, grated
1 red bell pepper, diced
2 cups of green beans, cut into 1 inch pieces
1 small summer squash cut into bite sized pieces
7 oz of apricot preserves
2 tbsp cornstarch dissolved in a little cold water
5 tbsp tamari
3 tbsp apple cider vinegar
1 tbsp light miso
Black sesame seeds for garnish

1. Toss the tofu cubes around in a large bowl with the rice flour until the cubes are well coated.

2. Heat enough oil to cover the bottom of a large cast iron skillet. Brown the tofu cubes on all sides, then take out of the pan and drain on brown paper/paper towels.

3. In a small pot, combine the preserves and water and simmer for 10 minutes.

4. While that's going on, heat the remaining 3 tbsp of water in a skillet (I just wiped out the one I made the tofu in and used that again) and sautee the veggies and ginger until they are tender-crisp.

5. Add the cornstarch dissolved in water to the apricot mixture and stir until the mixture begins to thicken. Add the vinegar, tamari, and miso, and continue to cook until the miso is dissolved and the sauce is thick.

6. Toss the tofu in with the veggies, pour the sauce over the whole lot and turn over gently to coat, then sprinkle with black sesame seeds for garnish. Serve over rice.

Wednesday, October 7, 2009

Ode to the Online Veg Community

I must say, the online veg*n community is absolutely fantastic. I sometimes wonder if outsiders think I'm crazy when I ramble on about things that happened on message boards and people I meet up with from the internet. In the "real world," veg*ns are often few and far between, and we're often so desperately happy to meet another veg that we are truly heartbroken when we find them eating a tuna sandwich (PESCATARIAN! the word is PESCATARIAN!). Online, we're a force to be reckoned with. Blog about something anti-veg or dis one of our favorite cookbook authors, and expect a torrent of comments from veg*ns like you've never experienced before. Write a "vegetarian" cookbook with omni convictions and you'd best bet no one's going to buy it (and don't even THINK about having sketchy ethics and expect to be on a best sellers list).

I was fortunate to have a family that accepted my vegetarianism from the get go, and to have a father that proudly explains to people that his daughter is vegan, even before I admitted it to myself. I am blessed to have a family and future in-laws who are supportive of my plans for a vegan wedding, and have said outright that if anyone doesn't it like it then screw 'em, they don't need to come. I am thankful every day to be with a wonderful omni man who gobbles down vegan food at home every day and has never even asked to bring raw animal flesh into our home. He even defends my choice to other people, and tells them how lucky HE is to have a delicious homecooked meal waiting for him every night. Not everyone is this fortunate, however, and for many, the online veg*n community has provided a sanctuary from the daily conflicts encountered from living in an omni world. They can find a place where their views aren't only respected, but embraced, supported, and applauded. These screen names and user icons become the friends and family many wish they had.

One of my favorite parts of being involved in online veg*n communities is participating in swaps. The rules vary from board to board, but the basics are the same - you make a box full of things you think your partner would like to try, and some of your favorite things, regional specialities, and hard to find treats, and in exchange you get a box of the same. Today I got a huge and wonderful swap-box from Veggieboarder Sallyomally that is going to be put to fantastic use as I experiment with all the interesting bits and bobs in my cooking.


This is a pic of my box contents from the last Post Punk Kitchen swap where I was paired with erin32mc.


This super selection was sent to me by PPKer ilovelabs


Much love to you all out there in Veg-on-the-Web land and thanks to all who have followed me through Week 1 of VeganMoFo!

Tuesday, October 6, 2009

Gnocchi and Greens Soup

Tonight's dinner was mostly brought to you by "things I had in my fridge/freezer." Sometimes if I'm going for cheap eats, I brainstorm with what I've got around the house and what sort of a meal it would make. When it gets cold out, I usually plan a soup or stew for dinner at least once a week. I keep quarts of homemade vegetable broth in the freezer and thaw them out as needed. I also had sweet potato gnocchi in the freezer that I made over the summer. So I thought "Hmmm Gnocchi soup." I already had the carrots and celery, and thought peas and greens might be nice. Peas I had in the freezer, greens I had to buy (and to that guy in the supermarket who bought ALL the Kale while I stood there with an open plastic bag waiting to get some kale, you suck. You could have left me one. Ornamental Kale is not the same). All this ended up costing me out of pocket was about $1.50 for the collards that I used in the soup. Good deal since it made a TON and it was VERY filling! (I should have known it would be considering how dense gnocchi is.) This recipe is just really the stuff I threw together in a pot. It was super easy to make. I'd suggest making half as much, however, if you don't care to eat it for a week.


Gnocchi and Greens Soup
1 rib of celery, diced
1 carrot, peeled and diced
1 tbsp olive oil
2 quarts of vegetable broth (I used 1 quart homemade + 1 quart water + bouillon)
1 bunch collards, torn off the stalks and cut into thin ribbons
1 cup frozen green peas
1 lbs gnocchi of your choice (isn't the sweet potato pretty though?!)

1. Heat the oil in a large pot over medium high heat and sautee the celery and carrot until it begins to soften some, about 3-5 minutes.

2. Add the broth and bring to a boil.

3. Add the collards, and turn the heat down to a simmer. Simmer about 5 minutes, stirring occasionally.

4. Add the peas and gnocchi and simmer for another 15 minutes until everything is heated through and the greens are as soft as you like 'em.

Monday, October 5, 2009

Cornbread

Cornbread is one of those foods I'm consistently obsessed with. There's rarely a time that cornbread doesn't sound good. Now that the weather is turning cold, however, cornbread is sounding ESPECIALLY good! It's great with chili or soup or as a side dish, or for breakfast... or with lunch... I'm not sure there's a bad time for cornbread! This is a Thanksgiving staple as well, but do test it out before the big day... if for no other reason because it means you get to eat more cornbread!!

When I was a kid my parents always bought those Jiffy Corn Muffin Mixes. I believe it was the first Thanksgiving I was a vegetarian that I was making the stuff and happened to look on the side of the box to find it contained LARD! I was HORRIFIED! And so upset, I mean come on, my cornbread was ruined by pig fat. It was a sad, sad day. I always figured if things came in a box mix, it meant that they were difficult to make, and thought my cornbread eating days were over. I couldn't've been more wrong. Cornbread is silly easy to make, and everyone LOVES my recipe! It's mutated from a recipe I found online, and really makes a nice moist loaf. I use whole wheat pastry flour, but if you're looking to be less healthy about it, white flour will do. Use blue cornmeal for an extra colorful version!


Cornbread
3/4 cup cornmeal
1 1/4 cup unsweetened milk of your choice
1 cup whole wheat pastry flour
1 1/2 tsp baking powder
1/2 tsp salt
1/3 cup sugar
1 tbsp ground flax seeds mixed with 3 tbsp water and left to sit until gooey
1/4 cup vegetable oil

1. Preheat oven to 400 degrees. Grease a 8X8 square baking pan.

2. In a small bowl, combine the cornmeal and the milk and let it sit for about 5 minutes (This will help the cornmeal start to absorb the liquid to make a nice moist bread!).

3. In a larger bowl, mix together the dry ingredients, then stir in everything else until the batter is smooth.

4. Pour the batter into the baking pan and bake for 30-35 minutes or until a toothpick stuck into the middle comes out clean. The top will also look a little cracked.

Sunday, October 4, 2009

Dr. Cow Cheese

Another one of my pursuits while in NYC was finding some Dr. Cow Nut Cheese. I'd heard that this stuff is the closest to actual cheese as you can get, and actually edible sliced and on crackers and things. This is hard to believe considering the quality of vegan cheeses in general. Granted I've not gotten my hands on any Sheese or Cheezly or Teese or Daiya (yet), but from what I have tried, it's really only suitable for mixing into casseroles or putting on pizza with a bunch of other things to sort of hide the flavor a bit.

I bought two pieces of Dr. Cow Cheese, one Aged Cashew and one Aged Cashew and Brazilnut Cheese. They were $6.99 and $8.99 respectively for a little over 2 oz of cheese. I was cringing at that when I bought it, but it was my birthday dammit, and I was going to treat myself.

Was it worth it?
Yes.

Man this stuff is good. I don't know if it would melt but really it doesn't matter because it isn't the kind of cheese you'd be buying for melting. It's nice and creamy with a good tang to it. It definitely has a nut undertone, but not in a bothersome way (unless of course you don't like nuts). I liked the Aged Cashew better than the Cashew/Brazilnut. The Boy thought it was as good as "real" cheese and perhaps ate more than his share of my precious bits of cheesy goodness. I also shared them with some of my local vegan crew and they all enjoyed it as well.

Other than the price, and the lack of local availability, the only criticism I have of this product is that it looks like fancy soap you'd put in your guest bathroom but you aren't ever actually supposed to use. But who cares really, it's for eating, not for looking at!


Cashew on the left, Cashew/Brazilnut on the right

Saturday, October 3, 2009

Creamy Butternut Squash Soup

As soon as the air got crisp and autumnal I began craving winter squash. I usually have to be pretty stealth in my efforts to incorporate winter squash into our diet since the boy doesn't care for it too much. On this occasion, however, I was desperately wanting a nice creamy butternut squash soup and I decided boy-be-damned I'm making it and if he doesn't like it... there's peanut butter in the pantry! He loved it though, and ate three bowls, remarking the whole time about how surprised he was that he loved it. The homemade croutons probably didn't hurt anything either... he's a sucker for that sort of thing.

The creaminess in this soup comes from two elements - white beans and almond milk. The beans are a nice extra stealth way to sneak in more protein as well, so they serve a dual purpose. I served this with some wild rice on the side and the aforementioned croutons as optional add ins. It looked extra halloweenie with the black wild rice flecks in the bright orange soup, though having eaten it both ways, I think just enjoying the simple creamy slightly sweet soup on it's own is yummy enough! This is another one I just made up based on what I thought would be good. An immersion blender is a wonderful tool for pureeing this soup, but if you don't have one, you can puree it in batches in the blender. I recommend taking the little cap off the top of the blender (not the lid, just the little cap thing made so you can pour additional stuff in while you blend) and instead placing a folded kitchen towel over the hole. This makes it so some steam can escape and the top won't explode off, while still protecting you from splatters!


Creamy Butternut Squash Soup
2 ribs of celery, sliced
2 carrots, peeled and sliced
1 small onion, diced
2 tbsp olive oil
1 quart (4 cups) vegetable broth
1 medium butternut squash, roasted* (Mine weighed 2.5 lbs at time of purchase)
1.5 cups cooked white beans, or one 15 oz can of white beans
1/2 tsp tarragon
1/2 tsp thyme
1/4 tsp ground cinnamon
1/8 tsp ground ginger
Pinch nutmeg
2 tbsp agave nectar
1 cup almond milk (or unflavored whatever milk you keep around)

* To roast the butternut squash, cut it in half lengthwise, scoop out the seeds and guts, lightly brush/spray with a neutral flavored cooking oil (i.e. canola, grapeseed) and bake, sliced side down, on a baking sheet in a 400 degree oven for about an hour -- though the time will vary considerably depending on the size of your squash. Just poke it with a sharp knife or fork every now and then and see if it's tender yet.

1. In a large soup pot, heat the oil over medium-high heat and toss in the celery, carrots, and onion. Sautee until they are beginning to get tender.

2. Add the broth, beans, butternut, and spices. Turn the heat to high and bring to a boil, then lower and simmer for about 30 minutes until the vegetables are all very tender.

3. Puree the soup together until smooth with an immersion blender, or transfer into a blender and puree in there.

4. Stir in the milk and agave, taste, adjust seasonings, and serve.

Friday, October 2, 2009

Eggplant Bacon!

This summer I lost most of my tomatoes to Blight. By most I mean I got like 5 good tomatoes out of 16 plants. This is apparently the fault of all the people who buy their vegetable plants at Walmart and the crappy suppliers they use that quickly spread this fungal infection all over the North East to innocents such as myself who buy organic heirloom seeds from a local company. The loss of my tomatoes was really incredibly sad, but I did end up with tons of squash, yellow, zucchini, and pattypans, heaps and heaps of beans, and lots of eggplants. For a while every meal was eggplants, squash and beans. I had to get pretty creative with some of it because the boy does not care for eggplant when it isn't breaded, fried, and drenched in tomato sauce. I had heard of Eggplant Bacon before, but all the recipes I could find online were for raw, dehydrated eggplant bacon. That wasn't what I was going for because I don't have a dehydrator, and in my opinion, anything "bacon" needs to be fried in fat. I thought then I'd just use the marinade that was used for the dehydrated eggplant bacon, but that was mostly just tamari. Then I said screw this, I'll figure it out myself, and made some really delicious Eggplant Bacon that I used in BLTs. The boy adored it and was upset I hadn't made more! WIN!

For this recipe, I used the long, thin Asian eggplants. They're less seedy and the skin is tender, but I suppose you could use a big fat Italian eggplant too if you peeled it and cut the slices in half to make them long and thing.


"Cats don't know it's not bacon!"


Eggplant Bacon
2 Asian eggplants, sliced thin on a mandolin
1/4 cup tamari
1 tbsp fake bacon bits
1 tbsp olive oil
1 tbsp veg worcestershire sauce
1 tsp liquid smoke
Canola Oil (or another high smoke point oil of your choice) for frying

1. In a blender or food processor, mix together the tamari, facon bits, olive oil, worcestershire sauce, and liquid smoke until relatively smooth.

2. Paint both sides of each slice of eggplant with the mixture, and lay in a dish to marinate. Pour the extra liquid over the top.

3. Marinate for up to 12 hrs. I did about 8.

4. Pour enough oil in the bottom of a cast iron pan to coat. Heat the oil on high, then add the slices of eggplant. Fry on both sides until browned, then lay on paper towels/brown paper to drain the excess oil.

The bacon doesn't get super crispy, except the skin, though the browner it is the better the texture (stop before it burns!) and the flavor is fantastic!

Thursday, October 1, 2009

VEGAN MOFO!!


It's that time of the year again... VEGAN MONTH OF FOOD TIME! (aka Vegan MoFo) It couldn't come at a better time for me because I completely slacked on the blogging through September, but I've been saving up pictures and recipes waiting for this day to come!! I'm going to try to post as much as possible in October, even if I don't have a new recipe every day.

I'm gonna kick this one off with a picture of my favorite part of my NYC trip this summer (okay, second favorite part -- first favorite was getting engaged!) -- A trip to Lulas! I'd been looking forward to it for months. One of my all time favorite treats is a vanilla soft serve ice cream cone with rainbow sprinkles. I haven't had one in years, and when I found out Lulas served soft ice cream, I couldn't wait to go. The soft serve flavors that night were Cake Batter and Chocolate, so barring vanilla, I had a swirl cone with both. It was so yummy. The boy had a rocky road cone that was also delicious. We ate a bunch of other vegetarian places while we were in the city, some better than others, and yet these were the only food pics I took.

Me looking quite crazed about my ice cream.

The Boy, looking much less crazed, but still happy.

Tuesday, August 18, 2009

Veggie-full Pasta Salad

This pasta salad has been a while in the making. I picked up the really cute tri-color ABC pasta at Trader Joe's last time I was visiting my parents and it's been lying in wait in the pantry for a pasta salad occasion. The occasion came about when we were invited to an omni BBQ and Bonfire! For occasions such as these, I try to make a side that could work as a light meal, but doesn't seem like I'm bringing an entree. This salad has a lot of nice bright veggies in an olive oil and tahini dressing, as I'm not a fan of mayo salads. If you wanted to make it even hardier, you could add in a can of drained and rinsed beans of your choice.

I'm realizing more and more what crappy macro shots my camera takes. My old camera did a much better job. This new one can't deal with light, no matter if it's natural, artificial, or flash and everything just comes out looking not nearly as good as it does in person.

Veggie-Full Pasta Salad
8 oz pasta, cooked and rinsed in cool water
1/2 cup frozen peas, thawed
1 ear of fresh corn, kernels cut off the cob (or 1/2 cup canned or frozen/thawed)
1 carrot, peeled and finely diced
1/2 bell pepper, finely diced
1 cup cherry tomatoes, quartered
2 tbsp parsley, chopped
1/4 cup extra virgin olive oil
1/4 cup tahini
Juice of 1 lemon
Salt and pepper to taste

1. In a large bowl, mix together the pasta and all the cut up veggies and parsley.

2. In a small bowl, whisk together the oil, tahini, lemon juice, and salt and pepper. Depending on the size of your lemon you may want to start with half, taste, and then add more for extra zing.

3. Fold the dressing into the pasta and veggie mixture. Chill until you're ready to serve.

Monday, August 17, 2009

Cold Sesame Noodles

This entry started as a part of the potstickers entry... but that one just went on and on so I thought I'd give it it's own post so one doesn't have to endlessly scroll to get to information on sesame noodles!

I paired the potstickers with cold sesame noodles because have I mentioned the heat thing? Somehow I underestimated the fact that to make cold noodles, you still have to boil water, but now they're in the fridge and I can munch on them chilled as needed. I got the recipe for the noodles off of cooks.com, but then altered it to my liking. I topped it with some julienned cucumber from the garden, and toasted sesame seeds. Scallions also go really well if you've got them around.

For a veggie with this meal (only a veg*n would not consider a meal with cucumbers in noodles and carrots, celery, and mushrooms in potstickers a meal without vegetables!) I made green (and purple and striped) beans sauteed in sesame oil and soy sauce with some toasted sesame seeds. I only sauteed them for a few minutes so they were still crisp and the purple ones held their color a bit. No real recipe there though, just beans sauteed in about 1 tsp each of canola and sesame oil, a clove of minced garlic, a few tbsp of toasted sesame seeds, and a few splashes of soy sauce!


Cold Sesame Noodles
8 oz of Soba or thin whole grain spaghetti noodles
1/4 cup + 1 tbsp brewed black tea
2 tbsp tahini
2 tbsp creamy peanut butter
1 tbsp + 2 tsp soy sauce
2 tsp toasted sesame oil
2 tsp rice wine vinegar
2 tsp sweetener of your choice
1/8 tsp garlic powder
Optional:
2 tbsp toasted sesame seeds
1 small cucumber, julienned (cut into thin strips)
Scallions, sliced

1. Cook the noodles according to the package directions.

2. While the noodles cook, mix together everything but the optional ingredients. I used my immersion blender, but a whisk and a bowl would work just as well.

3. When the noodles are done cooking, rinse them well under cool water, then toss them with the sauce and any optional ingredients you've chosen. Enjoy chilled!

Potstickers!!

Someone on the Post Punk Kitchen forums recently was talking about making potstickers, and I just couldn't get the idea out of my head. They are a little labor intensive so it's not something I make all that often, but the payoff is definitely there. I didn't make a crazy complicated filling this time around since it's HOT AS ALL GET OUT here on the East Coast (I guess the summer is trying to make up for July's constant rain and cold?) and I didn't want to stand in the kitchen forever either folding them, or frying them, so these are pretty basic. They are also delicious! You could certainly add in any other veggie you like as long as it's finely grated or diced small. I use my microplane when I grate the carrot so that I don't have to cook it ahead of time. It makes nice mounds of fluffy carrot shavings! The celery I just dice up into mini cubes and they stay crunchy after they're cooked, but in a nice and refreshing way. This recipe yields about 30-40 potstickers depending on the size of your dumpling wrapper and how much filling you jammed into them.

I'm going to make cold sesame noodles their own entry, because this bit is rather picture intensive!


Seitan & Veggie Potstickers
4 oz mild flavored seitan
6 shiitake mushroom caps
1 carrot, peeled and grated
1 rib of celery, finely diced
1 clove of garlic, pressed or grated
1/2 inch piece of ginger, peeled and grated
2 tbsp soy sauce
Dumpling wrappers (check your local Asian market for the egg free variety!)
Canola oil
Water

Dipping Sauce
3 tbsp soy sauce
1 tsp hoisin sauce
1/2 tsp sesame oil
1/2 tsp rice wine vinegar

1. Sautee the mushrooms briefy in a little oil until just cooked.

2. In a food processor, grind together the seitan (it helps if you dice it small) and the mushrooms.

3. Transfer the mushroom and seitan mixture to a bowl and fold in the rest of the veggies, the garlic, ginger, and soy sauce.

4. Fill your dumpling wrappers! Brush half of the dumpling wrapper lightly with water. Place about 1 heaping tsp of filling in the center of the wrapper


Fold the edges up to meet each other in the middle and press to make them stick (keep in mind you're not making a ravioli here! You want them to stand up in the pan)


You could call it a day there, or crimp the edges by folding them back on each other a few times along the edge.

To Cook -- Heat about 1 tbsp of oil in a large skillet over high heat. Get the pan nice and hot, then add the potstickers one at a time, bottom down, so they're all standing up around the pan


Let them cook that way for about 2 minutes or until the bottoms are brown and (wait for it) STUCK to the POT! (well pan... why aren't they called pan stickers?) Once they're all browned and adhered, add about 1/4 cup of water and put a lid on the pan and let them steam for about another 3 minutes or until the water is mostly cooked away. You still want the pan on high for this!! When you turn off the heat and open the pan, they should pop right out again, and have a lovely browned bottom and a nicely steamed top!


For the dipping sauce, just stir all the ingredients together. You probably figured that out on your own though didn't you? :)

Tuesday, August 11, 2009

Ice Cream Sandwiches!!

Imagine, if you will, sweet-and-spicy brown sugar cinnamon ice cream sandwiched between two molasses cookies, ice cold and fresh from the freezer on a warm summer day. Sound good? Then read on...

Last summer for our first potluck I decided to make ice cream sandwiches, and the brown sugar cinnamon ice cream was easily the crowd favorite! For this year's big giant BBQ, I decided to make them again, only this time with the softer, more easily bit when frozen Molasses Cookie than with the oatmeal cookie I used last year. I'm not sure why people don't make cinnamon ice cream more often. Maybe I'm just a cinnamon freak, but I think it's a fantastic combination! The ice cream recipe is based off of the one in Veganomicon. I choose coconut milk for the recipe by which one has the most fat in it, since you'll need to put the can in the fridge so the fat separates and rises to the top, then just scoop the fat off and use that for the recipe. Mmm.. coconut fat!


I realize now I should have taken a close up, but at the time I just wanted an ice cream sandwich!!

Molasses Cookies
2/3 cup canola oil
1 cup brown sugar
1/4 cup plain or vanilla soy yogurt
1/2 cup blackstrap molasses
2 1/2 cups all purpose flour
1/2 tsp salt
2 tsp baking soda
2 tbsp cocoa powder
1 tsp cinnamon
1 tsp ground ginger
1/4 tsp nutmeg

1. Using an electric mixer, cream the oil and sugar together well. Add the yogurt and molasses and mix until incorporated.

2. Sift together the dry ingredients, and stir them into the wet.

3. Cover the dough and refrigerate it for at least an hour until it firms up a bit.

4. Preheat the oven to 350 degrees. Roll dough into balls and place on cookie sheet -- for smaller "snack sized" ice cream sandwiches, about 2 tsp will do, for more "ice cream man" sized sandwiches, go for about 2 tbsp.

5. Bake in the oven for about 10 minutes (more or less depending on size) until the tops are cracked and the cookie is just set. Overdone cookies will be harder to bite when frozen!!

Brown Sugar Cinnamon Ice Cream
1/2 cup cream from the top of a can of coconut milk
1 cup soymilk
3/4 cup packed brown sugar
6 oz silken tofu, pureed
1 tbsp vanilla extract
2 tbsp maple syrup
1 tsp ground cinnamon.

1. Mix all the ingredients together well. Chill in the fridge until very cold. Freeze it in your ice cream maker according to manufacturer's directions.

ASSEMBLY!!
(do you really need instructions here?)
Put a scoop of the ice cream on the bottom of one cookie, and top it with another cookie (bottom side down). Allow them to rest in the fridge a while for the ice cream to harden some.

Tuesday, July 28, 2009

Summer Vegetable Risotto & Garden Loot

Check out the recent loot from my garden!!

A gentry squash (yellow), an eight ball zucchini, Cascade Beans (thanks KimberlyNE!), and some mysterious purple beans... sadly these all go green when you cook them.


Two more gentry squash looking rather like they're birds enjoying a conversation.


Not featured, snap peas! While the humid, rainy weather and otherwise cool temperatures are not doing my tomatoes well (I've got late blight. :( ), the squash plants and beans and peas are doing very well!! Now starts the process of trying to creatively use tons of beans, peas, and squash from the garden! I still had a quart of homemade vegetable broth left in the freezer from my last huge batch this winter, so I decided to use it to make a nice summer vegetable risotto. I used a yellow squash, beans, snap peas, and a half of a yellow bell pepper I had in the fridge. I also sauteed up a handful of shiitake and oyster mushrooms and added it to my portion. At the very end I stirred in a generous handful of fresh basil chiffonade (leaves rolled up like a cigar and cut into thin strips), sprinkled it with faux Parmesan sprinkles from the Ultimate Uncheese Cookbook (I make mine with half pine nuts and half sesame seeds. SO GOOD!) and it was divine!!

This recipe is really more of a technique. You can use any veggies you have in the house and as many of them as you've got. You can use less arborio rice if you want less risotto as long as you keep the 4:1 liquid to rice ratio.


Summer Vegetable Risotto
1.5 cups Arborio Rice
6 cups vegetable stock, simmering on the stove
1 tbsp olive oil + more for sauteeing vegetables
2 cloves garlic, minced
1 summer squash, diced
3/4 cups each green beans and snap peas, cut into small pieces
1/2 bell pepper, diced
1/2 cup fresh basil leaves, cut into thin strips
salt and pepper to taste

1. In a sautee pan, heat a little oil and sautee the veggies (minus garlic) until they are tender-crisp, about 5 minutes

2. In a large pot (3 quarts at least), heat the tbsp of oil and sautee the garlic for a minute until it starts to sizzle, then add the rice and stir it around so it get coated in oil. Once coated, add a few ladles full of the hot broth. Stir.

3. When the liquid is mostly absorbed into the rice, add a couple more ladles full of broth. Stir. Stir it every few minutes at least, and keep adding more liquid until all the liquid is absorbed and the rice is tender. It will get very creamy! This process should take around 20 minutes.

4. Fold the veggies and basil into the rice. Season with salt and pepper to taste. Serve, sprinkled with your Parma sprinkles.