Saturday, January 13, 2018

Triumphant return?

It seems I stopped blogging.

I had a lot of stuff going on in my life, then I had a wee baby vegan who will be THREE in April (don't know how that happened so fast!), I finished my PhD (paging Dr. Megatarian) life life life.

I thought I'd start again because my husband is on weight watchers and I'm trying to figure out how to feed us all without making his points explode for the day, and this will at least remind me of what we all ate when I need to meal plan! I also downloaded an app for this so hopefully it will make it easier to post. We shall see!

Friday, August 23, 2013

Raspberry Cheesecake Cookies

Last week we stopped at Subway for the boy to get lunch, and he came out and said I should be proud of him because he didn't buy a Raspberry Cheesecake cookie, even though they had them, and they are delicious. He then asked if I could recreate said cookie. Having never eaten a Raspberry Cheesecake cookie, which is assuredly not vegan (or gluten-free because I'm not allowed to eat gluten for the foreseeable future), I asked him about a million questions about the construction of said cookie. Then I went online and figured "well someone must have a copycat recipe that I can bastardize" and sure enough there were! They involved using Jiffy Raspberry Muffin Mix. What? Who does that? I looked up the ingredients list on Subway's website, and that involves neufchatel cheese and "raspberry bits" which contain 9 ingredients (sidebar: the meat at subway has ingredients lists. should the ingredients in meat be "meat?").

Ok screw that noise, I made up my own recipe based on recipes for other cookies.

What amazes me about these cookies is that don't have that strange grainy gluten free texture that a lot of gluten free baked goods have. They are a nice chewy cookie, and have a pretty smooth mouthfeel... for a cookie. The boy says that the original cookie is more of a sugar cookie texture, but the flavor is spot on! Personally I was not going to try to roll out cookies containing chocolate chips and freeze-dried raspberries, so drop cookies were my choice for this.

Ingredients note: I find vegan white chocolate "decorator" chips in the Kosher section of the grocery store. They are totally not good for you. Freeze dried raspberries are REALLY EXPENSIVE, $50/lbs at the co-op, but I bought about a heaping cup's worth, and it cost me $4. A pound of freeze dried raspberries is actually a lot of raspberries. My gluten free all purpose flour of choice is Trader Joe's brand. You can use regular all-purpose flour if gluten isn't an issue, just leave out the xanthan gum. You can also use another brand of gluten-free all-purpose flour, but I can't make any promises as to texture or flavor. Finally, as far as I can tell, Jello Instant Cheesecake Pudding mix is both vegan and gluten free. The package says neither.

The boy took this picture... on a dirty plate from my grilled nooch sandwich. Then he ate the cookies.


Raspberry Cheesecake Cookies

1/2 cup (one stick) Earth Balance Buttery Spread (softened)
1/2 cup (one stick) Earth Balance Shortening (softened)
3/4 cup dark brown sugar
1/4 cup white sugar
1/2 cup plain or vanilla non-dairy yogurt
1 tsp vanilla extract
1 tsp baking soda
1 tsp xanthan gum
1 package instant cheesecake pudding mix
2 1/4 cup gluten-free all-purpose flour
1 bag white chocolate chips (~2c)
1 cup freeze-dried raspberries, half pulverized

1. Preheat the oven to 350 degrees

2. Cream together the Earth Balance, Shortening, and sugars until light and fluffy

3. Blend in the pudding mix.

4. Add in the yogurt and vanilla and mix thoroughly.

5. Blend in the dry ingredients. Be careful with xanthan gum to not let it clump when you add it! Sprinkle it around the bowl or mix it into the flour and baking soda before hand. It's not called gum for nothing.

6. Fold in the chips and raspberries.

7. Refrigerate the dough for about 30 minutes to allow it to firm up a bit, then scoop onto cookie sheets in whatever size cookies you'd like. Small cookies will bake about 10 minutes, average sized cookies about 12, Subway sized cookies I'd guess about 14 minutes. You want them to look puffy and have a golden brown bottom (who doesn't want that?!). Allow the cookies to cool on the cookie sheets for about 10 minutes before removing to a cooking rack. Allow them to cool completely before putting them away.

Wednesday, November 7, 2012

Things I Found In My Fridge Soup

Really, it should be called "Things I Found In My Fridge and Freezer Soup" but that title was getting kind of wordy.

Since I've been out of work, I've had more time to be creative with meals. I don't need a plan to be perfectly executed after work in order to get everything done that I need to get done, like take the dog to the park and do the laundry and I don't know, rest a little? We've been doing a lot of eating down the fridge and pantry. I buy fruit, and some bits of necessities (lettuce, celery.. and pencil thin asparagus for $1.49/lbs? I can't say no!) but otherwise it's a free-for-all! Lately I've been using up the remaining scraps of the CSA share, lots of roots and greens. Tonight I combined them with my garden things (and other things) from the freezer and made soup. I also baked some fresh potato rolls with pesto, which fancied up the whole thing.

It's a perfect night for soup! It has been getting very cold here. So much so that I made Hamilton a sweater.

 Doesn't he look like a little frat boy??

But back to the main topic... SOUP!  There's no recipe for this, but I can list all the things in that nice steamy bowl. 


From the counter:
Garlic [csa]
Rosemary, Thyme [co-op]
Olive oil [store!]
salt/pepper [store!]

From the fridge:
Leeks [csa]
Carrots [csa]
Celery [store!]
Turnip [csa]
Kale [csa]
Sage [csa]

From the freezer:
Vegetable Broth [homemade]
Diced tomatoes [garden]
Tomato paste [store - OLD - it was getting freezer burned so I thought it was use it or lose it]
Seitan [homemade]

Sauteed up the garlic, leeks, carrots, celery, tossed in everything else, and let it simmer til it was all soft then ate it all up with warm, fresh, fluffy pesto rolls. It totally hit the spot! Also, I FINALLY have enough room in my produce drawers for all the produce in the fridge. I'm getting my shelves back!


Just for fun, this is Hamilton in his sweater from last year. HE WAS SO TINY! And he hated  it. He doesn't mind the current sweater. He likes being toasty :)

Wednesday, October 31, 2012

Happy Hallowiener!!!

Hamilton says... HAPPY HALLOWIENER EVERYONE!!!


Is that a tolerant mutt or what?? Hamilton won Funniest Costume at his Dachshund Halloween party last weekend! In case you can't tell - he's a caterpillar.

And now on to the food...

I'm ashamed to say that while laying in bed this weekend with the above featured dog (who really likes to sleep in snuggled under the blankets), I was watching Rachael Ray do halloween meals on TV, and she had an idea that didn't suck - pasta with roasted pumpkin and cabbage. Granted, she used chicken broth and dumped a bunch of cheese on top, but conceptually, it interested me. I ended up making pasta with butternut squash, broccoli rabe (aka rapini), and white beans, and it was delicious!! At least I thought so... the boy wasn't too into it, honestly. Having grown up in an Italian family, I'm pretty accustomed to eating broccoli rabe, and am not phased by the mild bitterness. My husband, on the other hand, found it too bitter and ate around the broccoli rabe. I don't see any reason the recipe couldn't be made with any dark green leafy of your choice, or, as Ms. Ray made it, with cabbage. Just the same, it was seasonally lovely and the white beans broke down some into the broth making it creamy and delicious. I would eat it again -- and I will because there's leftovers in the fridge and I don't think the boy will touch them :P


Pasta with Butternut Squash, White Beans, and Broccoli Rabe

3/4 lbs pasta-of-your-choice
1 bunch broccoli rabe, cut into bite sized pieces (I cut each stem into thirds)
1 small butternut squash (~1.5 lbs)
1.5 cups (or 1 can, drained, rinsed) cooked white beans
2 cups vegetable broth
2 cloves garlic, minced
1 tbsp Olive oil
Salt
Pepper

1. Peel the squash and cut it into cubes. Toss the cubes with about 1 tbsp of oil and spread on a baking sheet in one layer. Bake at 425 for 20-30 minutes (really depends on size!) until fork tender. Remove and set aside

2. Cook the pasta according to package directions. In the meantime, bring the 2 cups of broth to boil in a large pan, then add the broccoli rabe and garlic. Season with salt and pepper to taste. Cover and cook for about 10 minutes or until broccoli rabe reaches desired tenderness.

3. Toss the squash and beans in with the broccoli rabe and broth and to heat through.

4. Toss the veggies with the drained pasta. Enjoy!

Tuesday, October 30, 2012

Tofu McMegans

Happy Hurricane everyone! I hope everyone is safe and dry and has power and heat and water and all that jazz. We're in the north-east, but just got some wind and some rain, but we're all fine with no loss of any necessary services. Everyone was bracing for the worst, however, and the boy got released early from work yesterday, and did not have to be in until noon today. After a leisurely morning in bed, I asked if he'd like me to make breakfast, and he said "TOFU MCMEGANS?!", and we had the ingredients, so I obliged.

I have to laugh a little at the name Tofu McMegans, because our last name is actually a Mc, but it doesn't have the same ring to it. Maybe because it's the wrong number of syllables...

A Tofu McMegan is a piece of coated, fried tofu on an english muffin with Yves Veggie Canadian Bacon (or as we call it - canadian facon) and a slice of american-style cheese-style product. The tofu makes a remarkably good egg substitute, since at least in this application, it is all about the texture. I've found anything about a medium texture tofu and above works fine - any softer and it's hard to keep it together to pan fry it. The big brand English Muffin is not vegan, and I like the Ezekiel brand English muffins, but I've found many store brand English muffins are also vegan - so if you're looking for an e-muffin, check those out!

I only ever make two Tofu McMegans at a time, one for me and one for the boy, but it's easy to make more. The coating mixture would probably be enough that you don't need to double it if you're making an entire pound of tofu's worth.


Tofu McMegans

Coating mixture:
2 tbsp rice flour
2 tbsp corn starch
2 tbsp nutritional yeast
1/2 tsp mustard powder
Salt & Pepper

Other stuff:
1/2 lbs of tofu, cut into english muffin-sized squares (two slices side by side work too!)
4 slices Canadian Facon
2 slices nondairy american cheese of choice (I like Rice Vegan)
2 english muffins, toasted
Canola oil

Assembly:
In a shallow dish, mix together the coating mixture. Take the cut tofu and press it into the mixture to coat it on all sides. (It will stick to the wet tofu)

In a cast iron skillet, add enough oil to just cover the bottom. Heat the pan, and add the tofu, cooking until lightly brown on both sides (usually about 5 minutes a side). At the same time, you can heat/brown up the canadian facon.

Mmm steamy! The top right tofu has been flipped and is beautiful! The top left is waiting for its turn. 

Once you've got your tofus browned up and crispy and your facon heated, then just assemble! 

Bottom Muffin
Facon
Tofu
Cheeze
Facon
Top Muffin 

Delicious!! We had ours with hot mulled cider this morning, but often enjoy them with fruit smoothies in the summer.


Aaaand here's the puppy hanging with his "friends" on the windowsill! Stay tuned tomorrow for Hamilton in his Prize Winning Halloween Costume!

Wednesday, October 10, 2012

The Brunch Routine

Sometimes, it's not about what you're eating, but who you're sharing it with.

During the week, the boy does Tai Kwon Do a few nights, and we have Dog School one night, and Dog Play Group one night, and then on the weekends the boy games with his friends, and I have my things, and although we live together being married and all, everything we have to do sometimes gets in the way of quality time together. To remedy this somewhat, we started a Sunday brunch routine.

First it was just I'd make us a nice late breakfast/brunchy thing on Sundays (I'll have to write down my recipe for Tofu McMegans before MoFo is done. It's killer), and sit and talk, and eat things with maple syrup, and then he'd go about his day, and I'd go about mine. Our routine is now extended to take the dog to the park to play with his friends for an hour or so, THEN come home and have brunch together. It's really nice, I highly recommend it.

This week we had french toast and soyboy sausages and fresh pineapple. I use the french toast recipe from Vegan with a Vengeance, but I jazz it up by adding some brown sugar, vanilla extract, and cinnamon to the batter. It's great with locally made whole wheat bread, and fried up in a generous amount of earth balance, topped with some maple syrup. Deliciousness is evidenced below:


And if that isn't enough to give you the warm fuzzies, here's another picture of Hamilton. This was taken back in the spring, when he still had cankles. Man I miss those cankles.


Tuesday, October 2, 2012

MoFo!!! 2012 MoFo!!!


Hey Vegan MoFo'ers and welcome to the 2012 Megatarian version of Vegan MoFo! Last year, I really sucked at this, so this year, I'm going to try not to suck. That's my goal. I think I can achieve it for the following reasons:

1. I got laid off! I spend a lot of time cooking because I can, and because I don't have much else to do, and because it's more cost effective to make things from scratch than buy shortcuts. That said, if you have a job for me, let me know. The unemployment office said to tell everyone I need a job, so I NEED A JOB. If anyone is hiring a Researcher in the NY Capital Region, or anything in higher education administration, or if you need a PhD in Social Welfare, or a personal chef, pet sitter, something... drop me a line!

2. I got a puppy! This actually has nothing to do with completing MoFo. We got the puppy in February from the SPCA, but he actually prevented me from doing a lot of things for several months, because he was actually a Vampire Piranha Shark Puppy, who peed on things if you weren't staring at him... and sometimes when you did. Now he's a charming 9 month old housebroken puppy who loves the game "find it" (I dropped food! Come eat it!) while I cook. Meet Hamilton:


Don't be fooled, this puppy is PURE EVIL!!


 9 months old, so handsome and well-mannered!

And back to food! 

I categorized this blog as "comfort food" for MoFo, I think because it didn't fit anywhere else and I couldn't think of a good "other" at the time. Maybe I can stick to the theme too, who knows? Trying to at least start on the theme - I give you... soup! 

When I was an omni-kid, my dad would make homemade chicken soup with noodles and escarole. I loved that soup. Not the chicken so much, honestly, because my dad doesn't discriminate against gristle, but I loved loved the escarole and noodles in broth. 

Escarole is a leafy green that looks kind of like a bushy loose head of lettuce. It is part of the chicory family, like raddichio and endive, is slightly but not overly bitter, and can be eaten raw or cooked. It's somewhat difficult to find where I live, it appears at the co-op periodically, and sometimes they have it at the grocery store but it's often old and wilted there, so I was thrilled to get a giant head in my CSA box last week! I knew exactly what I was going to do with it -- make dad's soup!! I sub in vegetable broth for chicken broth, and white beans for chicken, and it is fantastic!! It makes approximately one giant vat of soup, but you could cut it in half or freeze some, just leave the pasta out until you are ready to serve it or it will suck up all the broth. 

The boy fancies himself a food stylist, so he stuck bread in it for the picture.

Escarole and White Bean Soup

1 quart vegetable broth
6 cups diced tomatoes
2 tbsp olive oil
2 cloves of garlic, minced
2 carrots, cut into coins
2 stalks of celery, sliced into bits of equal thickness to the carrots
2 cups cooked white beans
1 head escarole, chopped
2 cups cooked pasta of your choice
salt & pepper to taste

1. Boil a giant pot of water and toss the escarole in to soften for about 5 minutes. (You could do this in the soup after adding the broth to the veggies, but I find you need a much bigger pot, and it's just easier this way.)

2. Puree together the vegetable broth and diced tomatoes to make a smooth tomatoey broth.

3. In a large soup pot, heat the olive oil over medium high heat. Sautee the carrots and celery in the oil until they begin to soften, about 5 minutes. Add the garlic and sautee for another minute or two.

4. Add the broth, beans, and blanched escarole. Bring to a low boil, then turn the heat to low. Allow to simmer for about 30 minutes to let the flavors meld. Add salt and pepper to taste.

5. Add the cooked pasta immediately before serving. If you won't be eating all the soup right away, add the pasta to individual bowls and store separately so as not to have the noodles absorb all the broth.

Wednesday, September 19, 2012

Peanut Butter Chocolate Pretzel Cookies

This may be a recipe I shouldn't share, because I think I could make million selling it... but quite frankly I'm not all that industrious, so you might as well make some too.

I think there's something in testosterone that makes men go nuts for peanut butter - even moreso when it's pared with chocolate. The only male-persons I've know who would not get all glossy eyed over peanut butter baked goods were those who were allergic to peanuts. That's a waay different look, and generally involves epi-pens and ER visits. The boy is obsessed with PB, so I think I've baked just about every PB (+/- chocolate) recipe in every vegan cookbook I own. Some recipes are better than others, but overall, I find vegan cookie recipes to be really crumbley. Even adding more liquid doesn't resolve the issue, and underbaking doesn't make them less dry. A conundrum for sure.

Going on what may seem like a complete segue, upstate NY has entered the 21st century and we now have a Trader Joe's. Trader Joe's shopping makes up a very small percentage of my overall grocery purchases, but they do have some key items at good prices that I enjoy (like olive oil, and nuts, and dried fruit). One such item are the accidentally vegan Dark Chocolate Covered Pretzels. They make PMS so much more manageable (how did this post go from testosterone to PMS? I don't know. I promise it will end well).

Having bought one of these bags of wonderful, beeps and I were pondering how we could make them even better, and the obvious answer was bake them into a peanut butter cookie. This dream became a reality when being laid off has left me with way more time in the kitchen. I didn't want to pair the pretzels with a dry, crumbly peanut butter cookie, however so I decided instead to veganize a peanut butter cookie recipe and hit up Ms. Crocker for her best. It came out exactly how I wanted it! The cookie is moist and chewy and peanut buttery! I had to make a few batches to experiment with different cookie sizes and pretzel placements to get the pretzel to cookie ratio correct (and because they kept vanishing!), and I think a small cookie scoop does the trick! A small cookie scoop scoops 2 tsp of dough, which is about the size of... a large gumball? It doesn't look like enough dough to support a pretzel, but jam that sucker in there! It'll all work out in the end.


Before - the pretzel barely covers the cookie...


After! Pretzel is firmly in the center of a delicious peanut butter cookie!


Peanut Butter Chocolate Pretzel Cookies

1/4 cup earth balance shortening
1/4 cup earth balance buttery stick
1/2 cup brown sugar, packed
1/2 cup white sugar
1/2 cup peanut butter
1/4 cup vanilla soy yogurt
3/4 tsp baking soda
1/2 tsp baking powder
1/4 tsp salt
1 bag Trader Joe's Dark Chocolate Covered Pretzels (or if there's another brand I don't know about, certainly use those! they're mini pretzels though, that's important...)

1. Preheat the oven to 375

2. Cream the shortening, butter, peanut butter, sugars, and yogurt until light and fluffy.

3. Add the dry ingredients and mix until combined.

4. Scoop 2 tsp dough balls onto cookie sheet. Press one pretzel into the top of each cookie.

5. Bake for 7-8 minutes or until the edges are just barely golden. (longer for crunchier cookie, less for chewier)

The hard part is now. Leave the cookies sitting out until the chocolate re-sets. It takes longer for the chocolate to set than it does for the cookie to cool, so if you can't wait to eat one, don't -- just make sure you wipe your face before you try to go do anything respectable in the community (voice of experience. i once grocery shopped with chocolate all over my face. so embarrassed in retrospect).


Look at them all! So happy tumbling around on the cookie sheet!! 

Wednesday, August 29, 2012

Chipotle Ketchup, a.k.a. Chipotle Catsup

Summer tiiiime and the tomatoes are eeaasssyyyyy!! 

My garden is in full swing, and the tomatoes are finally ripening fairly steadily which means it's time to get preserving! My usual MO in the summer is to skin, cook down, and freeze the tomatoes in quart containers, ergo ending up with a freezer full of tomatoes and no space for everything else. I need to get over my fear of killing people with botulism via canning, so I thought I'd start with ketchup. Not just any ketchup, but Chipotle Ketchup. 

I first encountered Chipotle Ketchup at Tavern 27 in New Hampshire where the boy and I went on vacation last summer. With advanced notice, they prepared a wonderful vegan tapas platter for me, including chickpea fries with chipotle ketchup. While much recipe related googling yielded several companies that manufacture this fine condiment, I've never seen it in person, and set out to make my own. I couldn't find a ketchup recipe that really suited my needs -- for example, I do not need to make 25 lbs of tomatoes worth of ketchup, and I wanted to use fresh tomatoes not canned, so in the end I cobbled together a few recipes, maintaining appropriate tomato to vinegar ratios, and my first experience in canning was a success. You don't HAVE to process this ketchup for canning, however. You can just put it in the jar and store it in the fridge. I'm trying to avoid using refrigerator space for my projects, so I canned it. 

 My only criticism in the end is that the ketchup turned out much spicier than I had anticipated. My husband loves it, and its a fast burn, but when I make it again, I will probably cut the chipotles from 4 to 2, or try to get the seeds out of the peppers before adding it to the mix. Ergo, my advice is to adjust your peppers according to how hot you like things. 

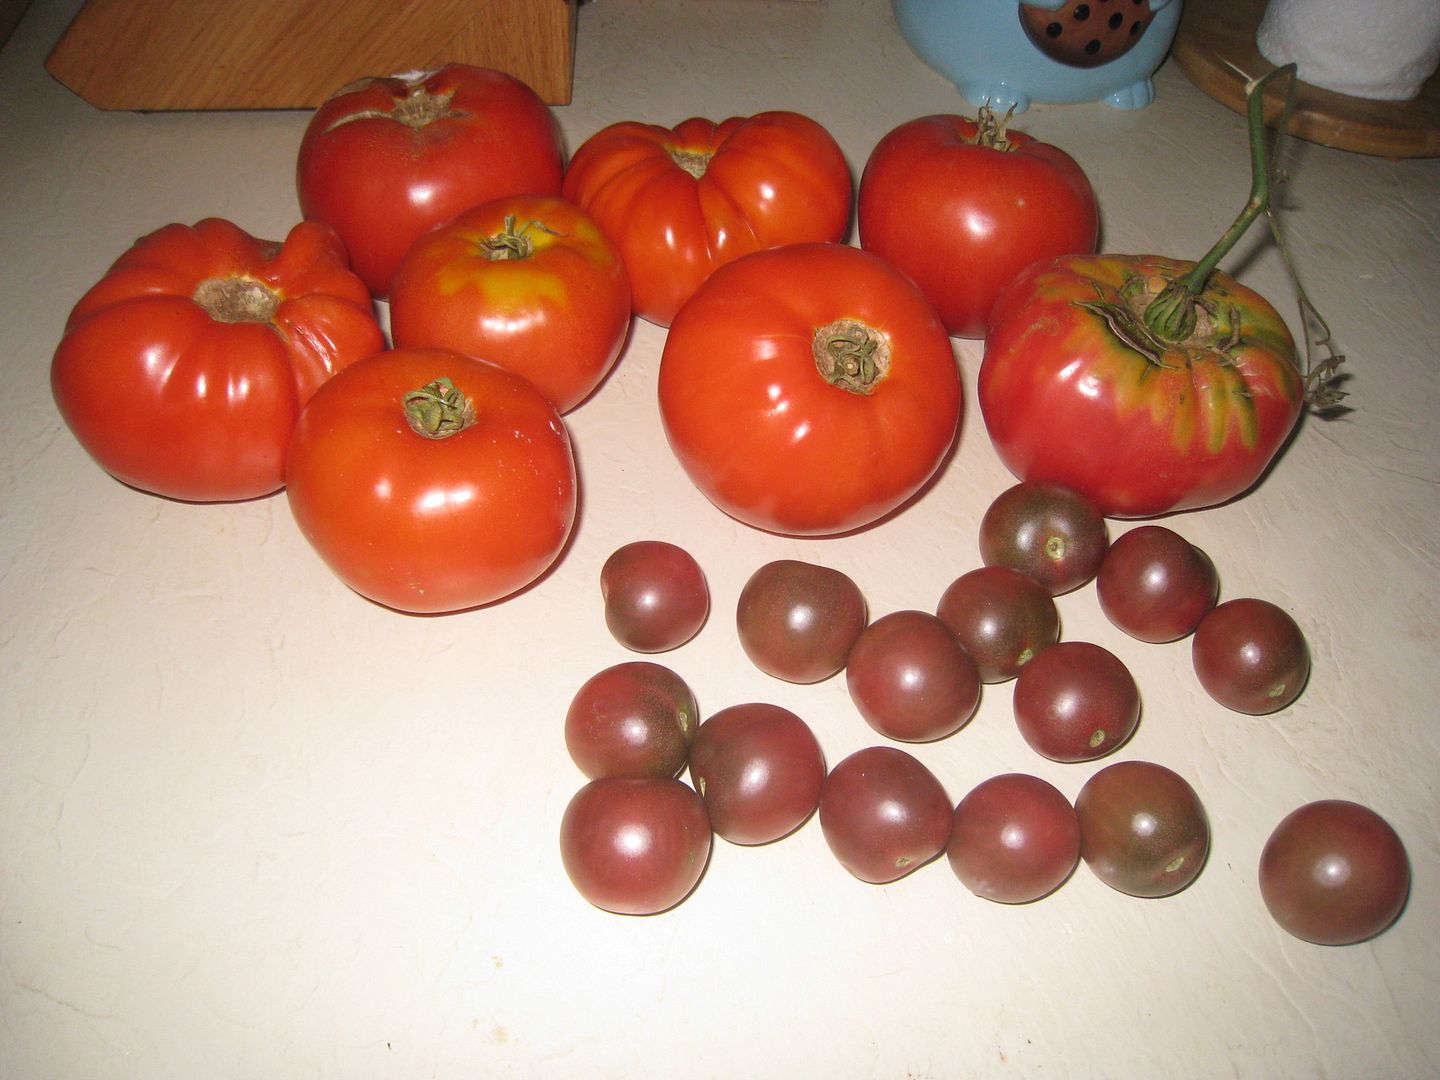
This recipe calls for 6 lbs of tomatoes. Before you get too anxious, this is what 6 lbs of tomatoes looks like:


Eight good sized tomatoes, and a few handfuls of cherry tomatoes. Not too bad!

Chipotle Ketchup
Yields approximately 2.5 pints of ketchup


Ingredients:
6 lbs tomatoes, peeled* and rough diced
3/4 tsp celery seed
1 small cinnamon stick
1/4 tsp allspice berries
1/4 tsp mustard seed
1 tsp whole cloves
1/4 tsp pickling spice
1 bay leaf
3/4 cups apple cider vinegar
1/2 sweet onion, rough chopped
1 clove of garlic, crushed
2-4 chipotle chilis, or to taste
1/4 cup brown sugar
3 tbsp molasses
1 tbsp salt 

* Before we begin, to peel tomatoes, make an X in the bottom with a serrated knife and carefully lower them into a pot of boiling water for about 30 seconds until the peel starts to split up the side, then transfer them to a bowl of ice water, then the skin will easily slide off! 

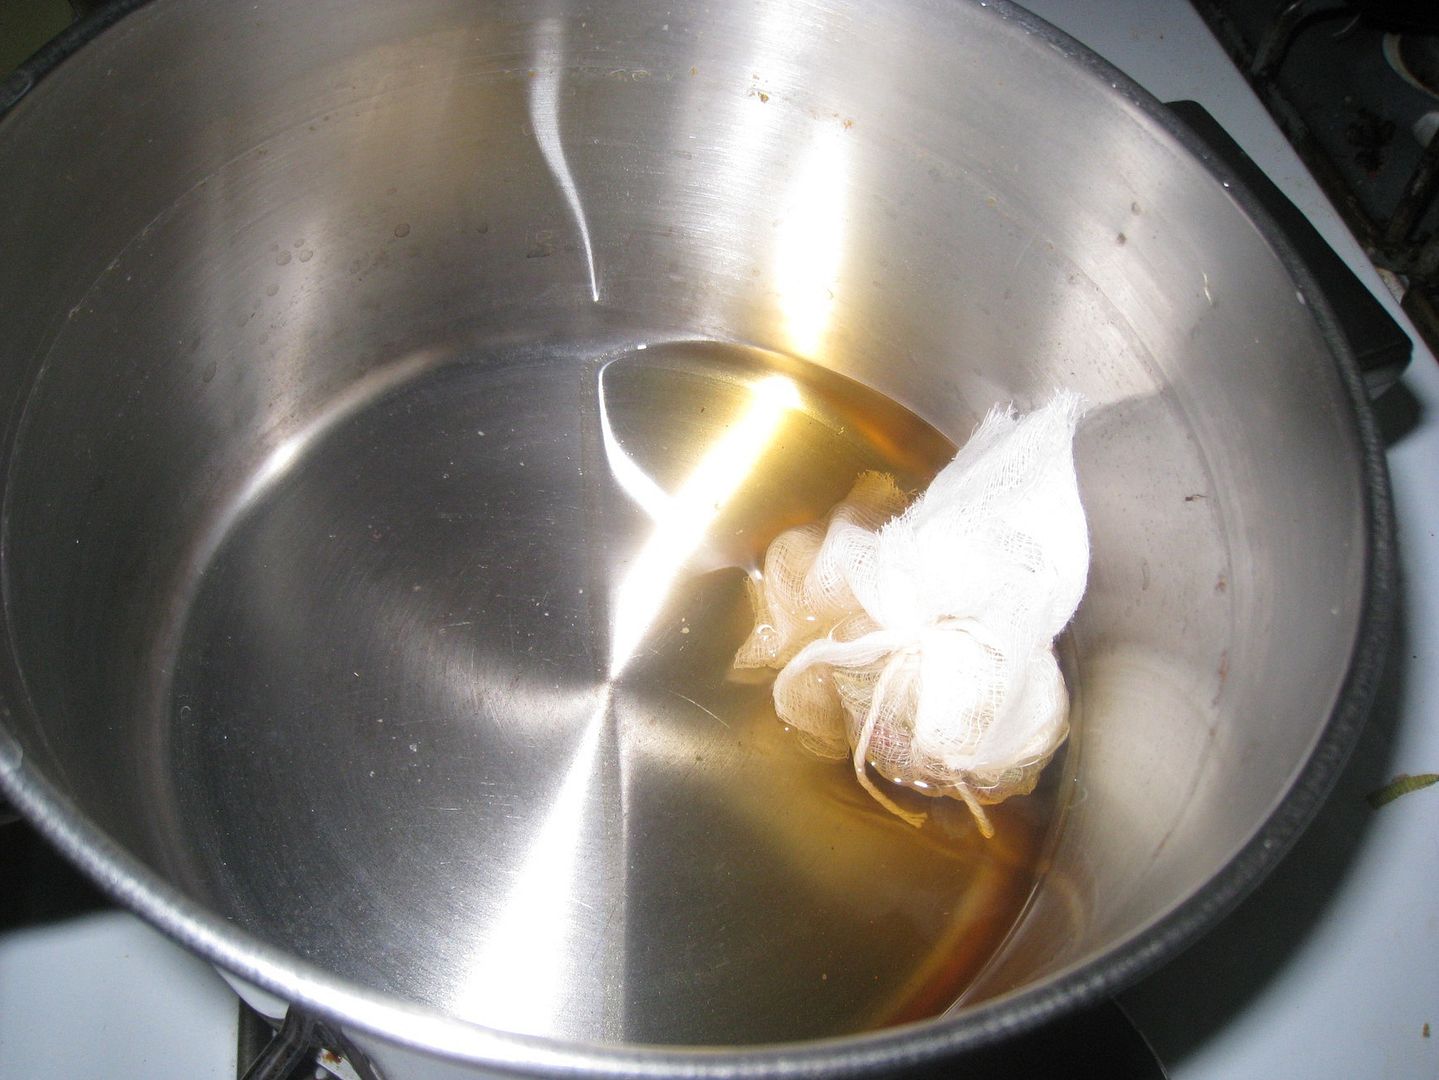
1. Tie all the spices into a piece of cheesecloth. In a small pot, add the vinegar and bring to a boil. Turn off the heat, add the spices-in-cheesecloth, and allow to steep for 25 minutes, like a very bizarre tea.

Ok, granted, this picture is sideways and won't rotate no matter what I do to it, but you get the idea about the spices in the cheesecloth in the vinegar.

2. In a large pot, place your tomatoes, onion, chipotles, and garlic, and cook at a low boil for 25 minutes. 

3. Add the steeped vinegar (not the cheesecloth), to the tomatoes, and simmer for another 30 minutes. 

4. Puree the whole mess. You can do this with an immersion blender, a food processor, or a regular blender - just be very careful when pureeing boiling hot food. 

5. Return the tomato mixture to the pot, add the sugar, molasses, and salt. Cook the mixture down at a high simmer until it reaches ketchup thickness - about 2 hours. Puree again if you feel it needs to be smoother. 

Now is decision time! You can just put the ketchup in a bottle or jar and stick it in your fridge and you're good to go! If you want to can it, the fun has just begun... 

To can!

1. Wash your jars with soap and water or run them through the dishwasher. 

2. In your large pot, place the jars and the bands and cover completely with water. Bring the water to a boil. Your goal here is to get your jars to about the same temperature as your ketchup so they don't explode. 

3. In a smaller bowl, place the (new! always new) lids in hot water. DO NOT BOIL!

4. Once your jars are nice and hot, place a folded kitchen towel on the counter. Carefully fish a jar out of the boiling water with your jar lifter, and carefully empty out the boiling water. The jar does not need to be dry. Place your funnel in the top of the jar, and fill it to 1/2 inch from the top. Place a lid on the jar, and finger-tighten the band on. Repeat until your jars are full.

* I had ALMOST five half-pint jars full. The fifth I did not process because it was not full, and placed in the fridge for immediate use. Do not process jars that are not full to 1/2 inch from the top. 

5. Lower the jars carefully back into your pot of hot water. If there is a lot of room in between your jars, place empty jars (no lids) around them to keep them standing up. Be sure your jars are completely submerged in the water. Bring the water back to a rolling boil, and process the jars for 15 minutes. The water must be kept at a rolling boil the entire time!

6. Turn the heat off from under the pot, and allow the jars to sit for five minutes. 

7. Carefully remove the jars using your jar lifter, and place them back on the kitchen towel on the counter. Sit back and listen to 'em pop! 

8. Just don't touch them for a while. One, they'll be hot. Two, you want to let them settle or something, I don't remember exactly, but everything I read about how not to kill your family via home preserves says to leave them alone for a bit. I left mine on the counter untouched overnight. 

9. 12-24 hrs later check your seal! The buttons on the top should all have "popped" in, and when you remove the bands, you should be able to lift the jars by just the lids and not have them come open. Store your jars in a cool place WITHOUT the bands on. Also, label them with the date and contents. When you go to open them again, check to make sure the tops are all still popped in, that they aren't bulging, that they make the popping sound when you open them, and that they look and smell normal. When in doubt, throw it out! 

Thursday, October 20, 2011

I can't believe I just veganized that...


Hey MoFo'ers! I hope this is a better late than never game. 'Round Megatarian land this has been Megan Month of Stress. ENOUGH WITH THE STRESS!! More with the food. I'll catch up, really, I took a bunch of pics and made a bunch of food. What better way to start in the end of the month than with a food that probably should not have been veganized, but as I type, the boy is sitting in the recliner beside me making yummy sounds.

Here's how it started.

KFC started running commercials for their NEW KFC Famous Bowl... with Bacon. The boy and I were watching TV and this commercial aired. I admit it, I married an omni with a junk-food-tooth. I think he may have started drooling. I told him he better not get that because he'd probably die on the spot. He pouted. I looked up nutritional info - the original bowl has almost 700 calories and over 2000 mg sodium. That's WITHOUT bacon!! NO!! I said. More pouting. OK OK I THINK I CAN VEGANIZE IT JUST DON'T BUY IT! He perked up. And so... tonight I veganized the KFC Famous Bowl with Bacon.

And here's how...

This was actually more complicated than I had expected, and I didn't exactly have everything I wanted to use. A KFC bowl is mashed potatoes, corn, fried chicken bits, gravy, cheese, and bacon.

Step 1: Make mashed potatoes (I used a half dozen organic red skin potatoes, skins on, mashed with earth balance, unsweetened original almond milk, a splash of apple cider vinegar, salt and pepper)

Step 2: Heat corn (Frozen corn + boiling water)

Step 3: Prepare Gardein Chick'n Tenders according to package directions

Step 4: Make Gravy (broth + poultry seasoning + nooch + tamari + cornstarch/almond milk slurry)

For cheese I used melted We Can't Say It's Cheese spread, and for bacon I used fake bacon bits.

Now here's the trick with these steps. You actually have to have everything ready at the same moment. Once it's all ready, layer and enjoy! This was where my fatal flaw came in -- I put gravy on top of everything, and the gravy is SUPPOSED to go over the potatoes with everything on top. This apparently did not ruin the integrity of the dish. The boy's only complaint was that the cheese texture was wrong. I hadn't planned on making this tonight; if I had I would have bought some Daiya shreds, but all in all yummy noises prevail*.

(* I'm not included in the taste test because I hate mashed potatoes!!! This actually looks really gross to me. Anything mashed potatoes based does. BLEH! But it's apparently quite good. The boy licked the bowl)

Saturday, July 23, 2011

CSA Share Week 4


Our shares are starting to get bigger! Still plenty of lettuce and cabbage, and I have to admit, at time of posting I have 2 1/2 heads of cabbage in my refrigerator. In my own defense, I also went out of town for a few days following the pick up of this week's share, so I didn't cook for a few days. I've begun sharing some of my share with my good buddy Erica, as our garden is also starting to produce and I've already got squash coming out my ears. I think squash pickles are going to be in our future!!

This week was lemon balm, lettuce, yellow squash and zucchini, swiss chard, garlic scapes, a broccoli crown, and some cabbage.

Not pictured -- I made a big pitcher of iced tea with the lemon balm. It isn't pictured because it tasted like cough drops and I ended up dumping it. It was worth a shot. haha.

I gave one yellow squash to Erica and she can tell you what she did with it! The other I sauteed with some olive oil, garlic, parsley and some shell peas from the garden. This was served with Tuscan Baked Beans made in the crock pot (great to keep the kitchen cool!) and a Kalamata roll from the co-op.


Lettuce and broccoli were both used in my tofu lettuce wraps and sauteed broccoli. I simmered tofu in some broth infused with sesame oil, ginger, garlic, soy sauce, and cilantro from the garden. I then sauteed up some bell peppers, celery and carrots and crumbled in the tofu and added some black sesame seeds. It was served in lettuce leaves alongside some broccoli sauteed in the rest of the tofu simmering liquid.

So neat and tidy!

I then had a "cleaning up the veggie drawer" night where I made EPIC VEGETABLE PASTA!!! It has mushrooms, corn, zucchini, garlic scapes, broccoli, eggplant, chard, spinach, garlic, fresh parsley and basil from the garden. Basically every veg drawer scrap there was!


I didn't get to the cabbage this week... hence the reason they're building up. I think one will go home with Erica this weekend. Maybe I'll make her contribute to this project too!!

CSA Share Week 3

Now the problems come in. Now I actually have to remember what 3 weeks ago looked like. Oof, got all caught up in life and things. I did get results from said medical tests back - my digestive system is permanently screwed up from some infections I had, I have cyclical nausea and vomiting syndrome, and have gastritis. At this point it's just a battle to manage symptoms. I think the moral of this story is don't let your appendix burst.

Onto happier things... CSA SHARE!

This week we got some more nappa cabage, cilantro, spinach, squash, garlic scapes, and red leaf lettuce.

The squash, along with some other veggie friends, got seasoned and quick roasted under the broiler.
Took them, along with some of the fresh spinach and hummus and made some lovely vegetable wraps, which we enjoyed with some sweet corn on the cob.
The cabbage got turned into Asian cole slaw with jicama, carrots, apples, and a peanutty dressing. Shown here with a Southwestern Tofu Burger and some of Kali's awesome tofu.

The lettuce was turned into a giant taco salad, with black beans seasoned with cumin and chili powder and tomato paste and some of the fresh cilantro. The rest of the cilantro and some garlic scapes went into the zesty cilantro lime dressing.

Thursday, July 7, 2011

CSA Share Week 2

I actually just picked up CSA Share Week 4... so I'm a few weeks behind, as usual. I had busy things, and sick things, and medical procedure things, and vegan potluck BBQ things, so BUSY!


Week 2's share contained Easter Egg Radishes, Nappa Cabbage, Lettuce, Spinach, and Garlic Scapes.

Garlic Scapes met up with Broccoli this week in a Broccoli Pesto stirred into whole wheat elbow macaroni, served along side carrots sauteed in Earth Balance and Dill and Gardein Crispy Tenders.


I sauteed the cabbage and spinach with red bell pepper, carrots, more garlic scapes, and what was supposed to be thin sliced 5 spice seitan, but my food processor mostly turned into ground seitan.

The lettuce and radishes went into a salad with a homemade vinaigrette and topped with a modified version of Chickpea Hijiki Salad from VwaV (no carrots; diced celery, dill). The boy looked at me like I was insane when I put this on his plate.... then ate two massive plates full of salad.

Now, with any luck, I'll get week 3 posted before week 5!

Thursday, June 23, 2011

Homegrown Veggies

This summer we are going to be overflowing with home grown veggies! First, we expanded our garden. It is now approximately... gigantic! 25 ft long by 25 ft wide surrounded by chicken-wire bunny fencing! It is so awesome. I planted stuff we haven't planted before, and all the usual things like tomatoes and peas and eggplants. I've also planted herbs in the garden this year, whereas in the past they've all been in pots. We have herbs in pots too! I love fresh herbs.

In addition to the garden, we joined a CSA! The joining of the CSA occurred before we finished expanding the garden. For those perhaps not in the know, CSA stands for Community Supported Agriculture. You buy a share of a farm, and in exchange you get locally grown yummy veggies every week for the growing season! We joined the Otter Hook Farms CSA, which conveniently offers a half-share, for those of us with crazy gardens. I pick up at the co-op after work on Thursdays, which is also convenient because it's on my way home! (for the most part.)

This is what we got in our box last week:
Left to Right you've got mixed salad greens, scallions, radishes, rapini and a pile of garlic scapes!

Here's what they all turned into!
The scapes made friends with some basil and made this super yummy pesto! It was 1 large bunch of basil, 1 handful of scapes, 1/4 cup olive oil, 1/4 cup pine nuts, a few tbsp nutritional yeast, the juice of a lemon, and salt and pepper to taste. A little spin around the food processor and you've got delicious zesty pesto!


The rapini (aka broccoli rabe) was sauteed in olive oil with garlic, red pepper flakes, and lemon zest, topped with a few pine nuts.

The radishes and mixed greens went into a roasted portabello mushroom salad. This is based on the recipe in Veganomicon, though I marinated the mushroom in equal parts balsamic vinegar, tamari and water with oregano, basil, and rosemary. I roasted them off in the oven, and they're sitting on a bed of salad greens with chickpeas, avocado, radishes, and cherry tomatoes. (The boy's salad also included onions)

Not pictured, the boy ate the scallions in his eggs in the morning.

Meanwhile, in the Kaleyard... (pretend there aren't tons of weeds, ok? It's been downpouring and the weeds are VERY happy. So are the veggies, so I guess it's only fair. Also pretend there isn't a damned basketball hoop pole there :| We're still addressing that issue)


Overview

Peppers! Basil! Squash of many varieties! Beans! Peas!
The shell peas are flowering!

Tomatoes on really, really, really big stakes.
The kale is growing like mad, but it's hard to tell with all the weeds. The cauliflower and cabbage and things are getting really bushy!!

Saturday, May 28, 2011

Orangeade

Summer tiiiiime and the livin' is easy!!

I was working at the co-op this afternoon and a woman was buying a huge bag of lemons. She commented that she and her daughter are hooked on homemade lemonade. I thought "mmm.. lemonade" then I thought "MMMM... ORANGEADE!!"

My grandma used to make Orangeade, and when my Mom was a kid one of her jobs was making the orangeade. My mom used to make it for us when we were kids, maybe once or twice a summer because honestly, squeezing all that fruit is a bit of a hassle! She had an old fashioned metal citrus press and you'd have to put all your weight on it (we were kids, remember?) to press the juice out. Sure, mixing storebought orange juice with lemon juice would be faster, but it wouldn't be the same!

I don't really know my grandma's recipe. If I asked my Mom, she might have an idea of the proportions, but my Mom is in Italy right now, and incommunicado, so I winged it. The end result is delicious, though much lighter and more refreshing than my Grandma (and Mom's) Orangeade. The reason being that my Grandma's secret ingredient, we joke, was sugar. It's only sort of a joke, she put sugar in everything. The reason I'd only ever eat my Grandma's potatoes and carrots as a kid? She cooked them in sugar, not even kidding. So I think that if you doubled the amount of sugar I used, you'd get about what my grandma made... except Grandma didn't make simple syrup, your Orangeade was just gritty until the sugar dissolved. Try it with one cup of sugar -- or double it if you like things really sweet!!

This recipe is 2 weight watchers points plus per 8 oz cup. (For comparison, for those of you not playing this game, 8oz of plain old orange juice is 3 points)


Orangeade
1 cup fresh squeezed lemon juice (about 6 lemons)
2 cups fresh squeezed orange juice (about 6 oranges)
1 cup of sugar, mixed with 1 cup of water and heated in a small pot until dissolved ("simple syrup")
10 cups water

1. Mix everything together.

2. Pour over ice. Drink.

3. Wow this is an easy recipe!

Friday, April 15, 2011

Jicama Slaw

*Yawn* <----STRETCH----> Spring already is it?


Hmm.. seedlings... must be spring!

It was a long snowy winter during which I started a new job THANK GOD! My life is so much better now, what without having to drive all over the county (with gas at $4/gallon, tyvm) and not coming home reeking of cigarettes and cat urine. Yes, my new research job is paradise in comparison. But alas, the blog did fall to the wayside. I'm going to try to do better!

Big change in our house as of late -- the boy joined weight watchers. As such, I am now calculating the points value of everything I make. This is a bit tedious at times, but I figured since I've already done the work, I'll include the points value for anyone else who may be weight watching. And, for the record, the boy has lost 5% of his body weight in the past month! (I've also lost 3 lbs, though I'm not even doing weight watchers!)

One change I've made is that I'm just making a metric ton more vegetables for dinner every night. Instead of having a starchy side and a veggie side, we have 2 veggie sides. Instead of having pasta for an entree, we have pasta with a side of extra protein or vegetables. This recipe I invented randomly thinking about how much I enjoy jicama. I thought "Now wouldn't that make a lovely slaw?" and damn it does! I combined Jicama, Apples, Carrots and Cabbage for a delicious side dish that I've been eating every day since I made it! (I'm glad it's good, because this recipe made a LOT of slaw!)

The other big change in my house, kitchen in particular, is my CUISINART FOOD PROCESSOR!! The boy bought it for me for Christmas! That made prepping this about a million times easier since it shreds veggies like a dream! Certainly could be done on a box grater too, but watch your knuckles!


So pretty and purple!


Jicama Slaw
1 medium jicama (mine weight approx 1 lbs)
1 small head of purple cabbage (about softball sized)
2 large carrots
1 large granny smith apple
1/4 cup fresh squeezed orange juice
2 tbsp white wine vinegar
2 tbsp sesame oil
Salt & Pepper to taste

1. Shred all the veggies and mix them up together.

2. In a small bowl, whisk together the dressing ingredients.

3. Combine the dressing and the veggies and mix well. Add salt & pepper to taste. Allow to sit for a bit to let the flavors mingle.

I found that the flavors got even better the next day! The sesame oil really mellowed out and the vinegar tanged up some! It yielded approx 7.5 cups of slaw! Hence my eating it daily.

WEIGHT WATCHERS POINTS PLUS: 1 point per cup of slaw

Tuesday, November 30, 2010

Vegan MoFo Day 30: Comfort Food


I made it! I made it I made it I made it! 30 days of blogging! Sort of on a holiday theme the entire time. A few diversions anyway, but hey, I posted every day and that's what counts. I decided to end November with a typical easy cleaning-out-the-fridge comfort dinner we enjoy at Casa Megatarian. It can best be described as Pasta Primavera, as it is veggies and noodles, though we just go with the simple "vegetable pasta." It's quick, it's easy, it's delicious, and it will take whatever you've got around the house to toss in! I'll write up what I tossed in tonight, but it's just a suggestion. The important part is to have at least as many veggies as you've got pasta!


Vegetable Pasta
12 oz wholegrain pasta
1 large broccoli crown
1/4 head of cauliflower
1 15oz can fire roasted diced tomatoes
2 cups frozen peas
2 cups frozen spinach
3 cloves garlic
2 tbsp olive oil
Handful of fresh flat leaf parsley, chopped
salt and pepper to taste

1. Prepare the pasta according to package directions.

2. Meanwhile... cut the veggies into bite sized pieces and dice the garlic. Heat the oil in a large skillet (I use a wok) and sautee the garlic until it is fragrant but don't let it brown. Add the veggies and sautee the whole lot until they've reached desired tenderness. Add bits of water here and there if the pan is getting too dry.

3. Drain the pasta, toss with the veggies, fresh parsley, and season to taste with salt and pepper. Serve with your Parmesan cheese substitute of choice!

And now, since I may not blog again for Blog knows how long, I leave you with a cruddy picture of my Christmas tree, and Laser Cats.