I am not that ambitious.
I do love homemade seitan, however, and this is how it's done in my house.
This recipe is adapted from Vegan with a Vengeance by Isa Chandra Moskowitz
Seitan
2 cups vital wheat gluten
1/4 cup nutritional yeast
2 tbsp all purpose flour
1 cup cold vegetable broth
1/2 cup tamari
1 tbsp ketchup
1 tbsp olive oil
2 cloves garlic, pressed
Cooking Liquid
12 cups of vegetable broth
1/2 cup tamari
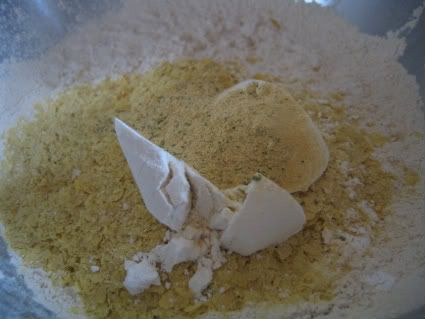
Step 1: Dump all dry ingredients into a bowl and mix together [I find a Kitchenaid Stand Mixer works well for seitan making, but you can do this by hand as well]
Step 2: Stir together all the wet ingredients and garlic (DO NOT include the cooking liquid)
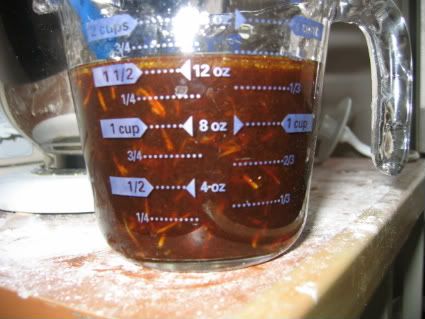
Step 3: Mix the wet ingredients into the dry ingredients

Step 4: Let the mixer mix it for a few minutes, OR knead by hands for a few minutes. It should look like brains.
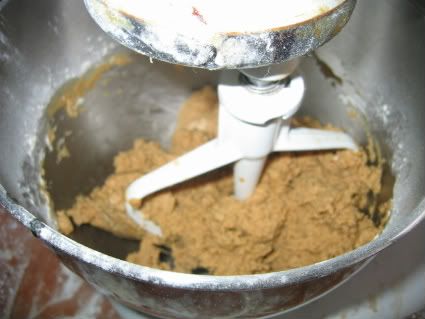
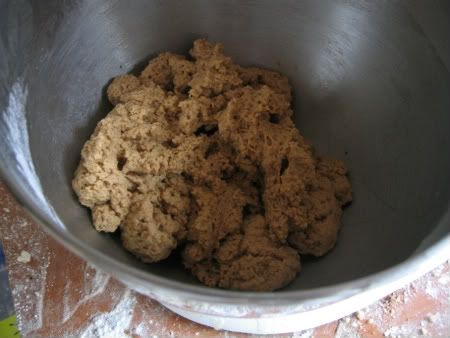
Step 5: Take your brain-tan and form it into a log-style shape and let it rest for 5-10 minutes

Step 6: Using a serrated knife, slice the seitan into 4-6 pieces. You should have nice small air pockets inside
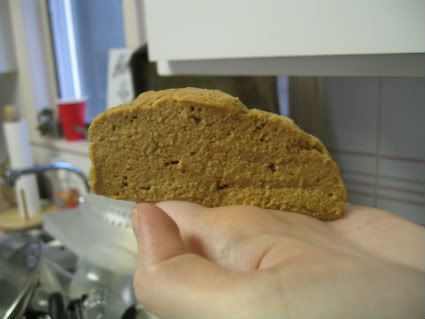
Step 7: The Cooking Step.
There are as many ways to cook seitan as there are to eat it! Ok, maybe not, but you do have a bunch of choices.
The easiest and most traditional way is to drop your seitan pieces into a large pot containing your cooking liquid (cold). Bring the water to a boil then IMMEDIATELY turn down to a very low simmer and cook, covered, for about an hour or until the seitan floats. Poke it around every now and again to make sure it doesn't stick to the bottom of the pot.
Then there is the dry-bake method, coined "Seitan O'Greatness." This method produces a much firmer, more dense seitan. With this method, stop at Step 5 and roll your seitan up in aluminum foil, tightly twisting the ends to make a big aluminum sausage. Bake in the oven at 325 for an hour and a half. Don't be alarmed if the foil explodes in the oven. (Oh who am I kidding, it's pretty alarming! But not messy. Just wrap your ends tighter next time and maybe use more foil. Those super wide heavy duty foils are great for this.
"Mexican Style" Seitan O'Greatness with tomato paste, lime juice and zest, cumin, paprika, and cilantro:
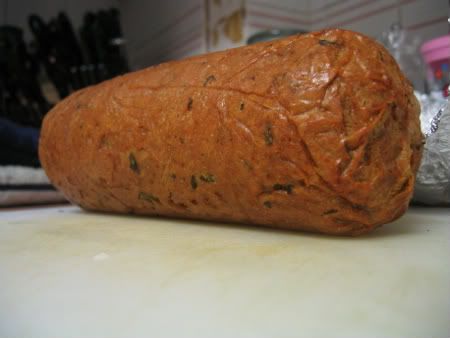
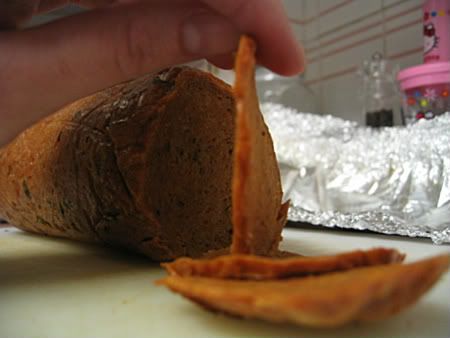
You can slice this stuff really thin!
Then there is my variation on the stovetop liquid method which yields a very tender seitan, but takes twice as long. Take your seitan and wrap each piece in cheesecloth and tie with butchers string (bet you didn't think there was use for that in a meg*n kitchen!) and then proceed as with the first method. After one hour, untie the packages and put the seitan back in simmering for another hour. This produces a nice dense tender seitan, and moister than the dry-bake method.
Seitan Cheesecloth Bundles:

All the kids in the pool!:
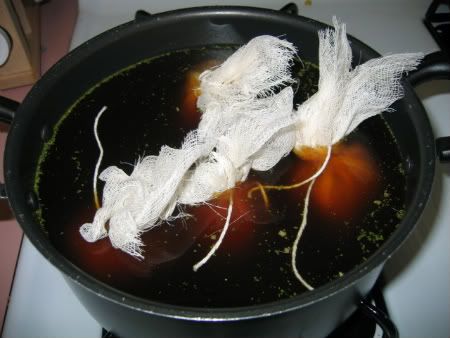
Dense, yet moist. A thrilling combination:

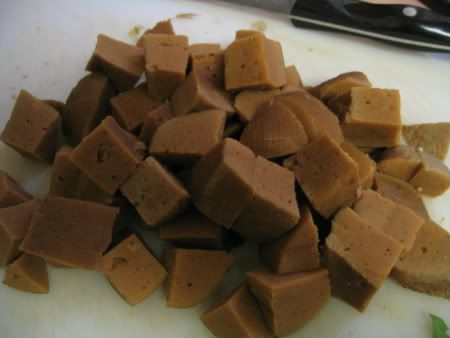
And yet another wet variation of my own devising. This one was inspired by Alton Brown's Baked Barley. He bakes barely so that the temperature around it stays steady and the water never just boils away. Fascinating. If it's good enough for Barley, it's got to be good enough for seitan, right? Right.
Put your seitan pieces in the pot with your cold cooking liquid. Bring it to a boil on the stove THEN take it OFF the stove, put the lid on, and stick it in your pre-heated 350 degree oven. (Don't try this with pots that aren't oven safe. If you don't have oven proof cookware, transfer the seitan and hot liquid VERY CAREFULLY to a casserole dish with a lid and put THAT in the oven. Very Carefully.)
Bake for about 1 hr and 15 minutes or until your seitan is all floating.
This yields wonderfully tender seitan.
STILL TOO CHEWY??
One more variation to try...
Replace the cup of vegetable broth in the seitan wet mix for 1 cup of pureed silken tofu. Ohh man, that seitan will MELT in your MOUTH!
As for the spices... mix it up a bit! Experiment with different herbs and spices and liquids and cooking liquids and heck, even cooking methods, until you find one that works for you. So you have a few batches of inedible seitan? So what? Live and learn.
After cooking, whatever method you choose, Seitan will firm up in the fridge overnight, so try to plan ahead. If you've cooked it in liquid, store it in some cooking broth in the fridge until you're ready to use it. If you aren't going to use it in the next three days, stick it in the freezer. Unlike tofu, Seitan come out of the freezer just like it went in.
7 comments:
WOW! Thats a great tutorial and it's nice to see exactly how another person's seitan looks, step by step. I like the sounds of the cheesecloth method, I haven't tried that yet but am thinking it'll be just about perfect for the texture I'm looking for.
Megan! Thank you for having this guide here! I always look for your posts when I'm trying to figure out seitan and this is a wonderful walk through :)
Thanks again, and I love your blog!
Beachbnny
Great tutorial! Tonight, I'm trying your method of using silken tofu and the aluminum dry bake cooking method. Can't wait to try it. I'm sure it will turn out great.
Quick update: my aluminum foil popped, as mentioned in the blog. It appears that seitan expands quite a bit (33% or so), so I think next time, I'll use the really heavy duty aluminum foil. But so far, so good. I re-wrapped this one and still cooking. Got 30 minutes left to go...
I created a monster! This thing keeps expanding. I think I'll have enough seitan for the next month. It's at least twice its original size now!
Final entry: the seitan turned out extremely good! Not a rubbery texture at all (which was my problem in the past). Your recipe is great. And it does slice up very well, and very thin. I think that the thin slices helps it alot.
I think I'm on a roll and will do this quite often, now that I know how to do it the right way!
Thanks for the tips!
Hi! I've just started reading your blog. I love it. Just made Seitan o Greatness following your recipe. It's delicious. Thank you so much for all your work and for sharing. What a terrific resource for healthy cooking!
Post a Comment